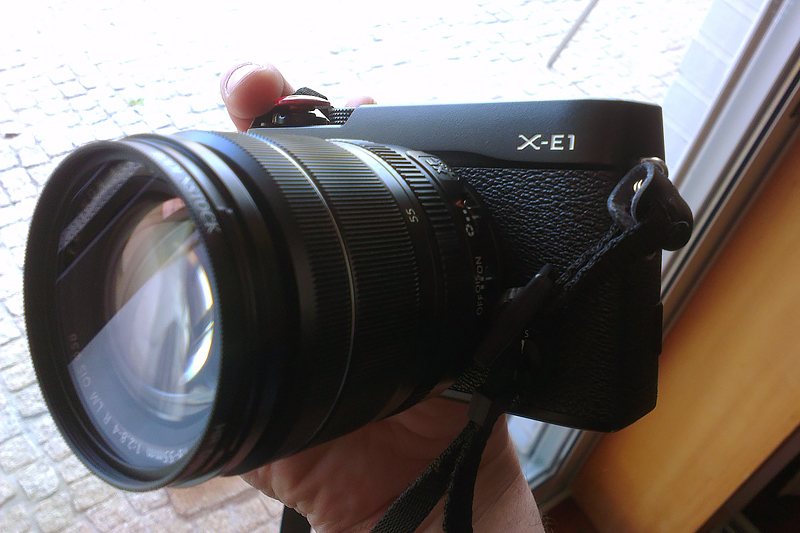
I just got my hands on a Fuji X-E2 kit with the Fuji XF 18-55 F2.8-4 OIS lens. As a longtime DSLR user, I’ve been skeptical about the mirrorless systems’ capabilities. I’ve tried a fair number of top compact cameras, but the results were always lacking.
Last month, I got to play with a Fuji X-E1 for some time, and the results were really surprising in the best possible way. General use, image quality, and high ISO performance were on par with any APS-C DSLR I’ve tried.
The X-E2 is even better. It has a better EVF, it’s faster, and it can focus better in low light conditions with its phase detection focusing system. It also boasts a second generation sensor and some nice improvements like dedicated AE-L / AF-L buttons.
So, onto the details.
Specs
Here are the main features of the Fuji X-E2, according to Fuji:
- 23.6mm x 15.6mm (APS-C) X-Trans CMOS II with primary color filter
- Total number of pixels: 16.7 million pixels
- Equivalent to ISO 200 – 6400 (Standard Output Sensitivity). Extended output sensitivity: Equivalent to ISO 100, 12800 and 25600
- Dynamic range: AUTO (100-400%), 100%, 200%, 400%
- 7 fps continuous shooting (28 frames buffer in JPEG, approximately 8 frames in RAW/Raw+JPEG) or 3 fps (up to capacity of the card buffer in JPEG, approximately 8 frames in RAW/Raw+JPEG)
- Lens Modulation Optimizer (for sharper JPEGs when shooting at large or small apertures)
- 2.360K-dot OLED color viewfinder
- 3.0-inch, aspect ratio 3:2, Approx. 1,040K-dot, color LCD monitor (Approx. 100% coverage – non-tilting, not touch-sensitive)
- Built-in Wi-Fi for image transfer to smartphones or computers (standard wireless protocol)
- Full HD 1920 x 1080 60p / 30p, Continuous recording: up to approx. 14 min. HD 1280 x 720 60p / 30p, Continuous recording: up to approx. 27 min.
- 2.5mm stereo microphone socket, can also be used for electronic remote releases
- Available in silver or black
Build and Construction
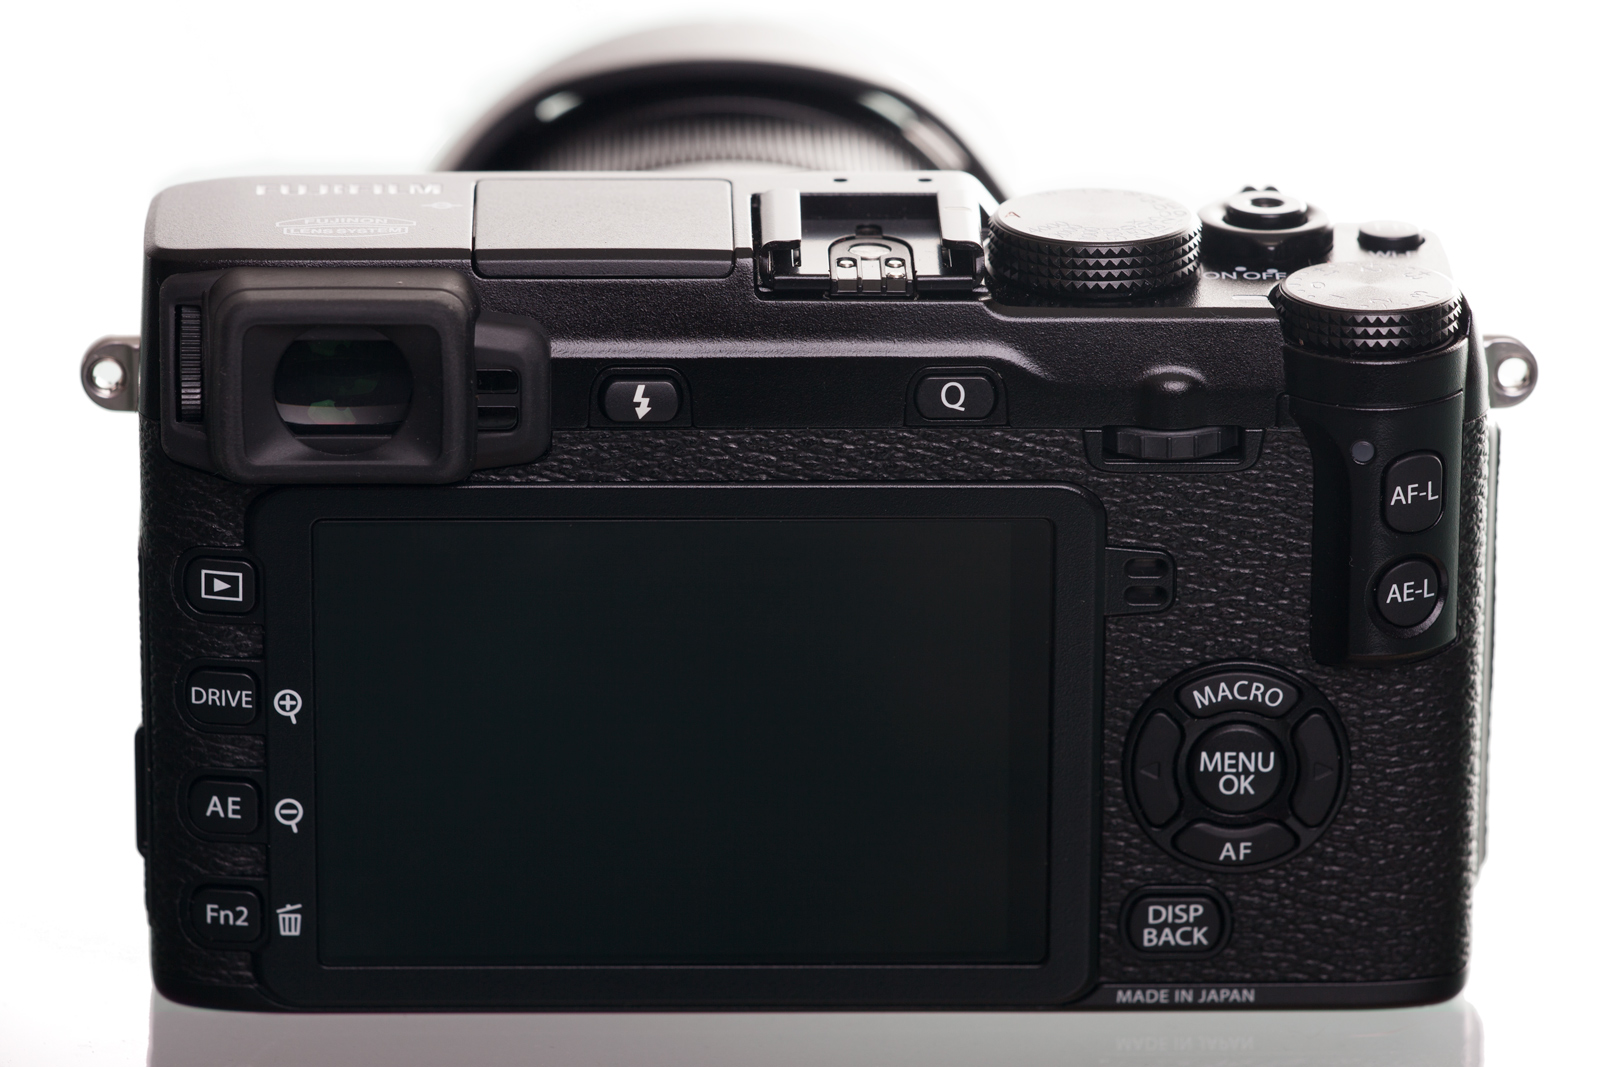
The body is robust, with its magnesium alloy top, front plates and top dials machined from metal. The back has a 3-inch 1,040,000 dot LCD, which delivers a clear and sharp image; but, unlike some of its recent competitors, it doesn’t have tilt/swivel or touch controls. The back buttons are plastic and feel somewhat inferior to the rest of the camera’s build construction.
The camera is nice to hold, even if it takes some time (not much, though) to get used to its size and ergonomics. It also features a small pop up flash that can be pulled to be bounced. The flash is not very strong but it is helpful for some fill-in light. The EVF and LCD are both bright and clear.

Size and Weight
When I first held the Fuji X-E2, I couldn’t help but feel mesmerized at the size and weight of it compared to any of my other cameras (Canon EOS 5D MKII and Canon EOS 7D). This camera is small and light. I can’t stress that enough. If you’re used to carrying heavy gear, this is a very welcome feature. Here are a few pics of it alongside the Canon EOS 7D:
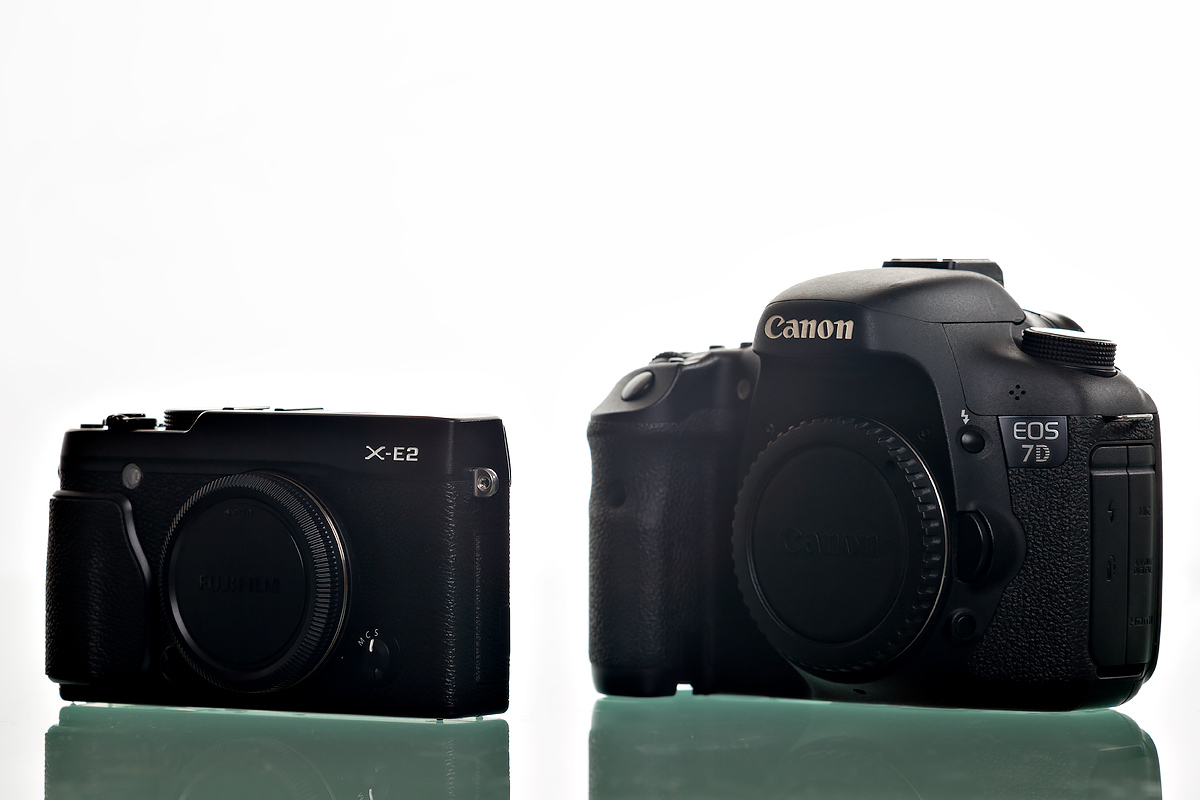

- Canon EOS 7D – 820g (no battery)
- Canon EF 24-105 F4 L IS – 670g
- Fuji X-E2 – 350g (including battery)
- Fuji XF 18-55mm F2.8-4 OIS – 310g
With the lens attached, the Fuji weighs 660g, and the Canon weighs 1490g.
Why is this an argument? Aren’t big cameras the best? Not necessarily… My DSLR backpack is heavy, bulky and too cumbersome to carry with me at all times. These smaller cameras, with their great image quality, offer a no compromises, light and fun set to carry with you at all times.
Interface and Usability
With its retro look and simple dial controls, the Fuji X-E2 is a joy to use. The lack of an exposure mode dial (where you would normally select A for Aperture Priority mode, S or Tv for Shutter Priority mode, etc.) might be confusing at first, but the same exposure modes can be set using a combination of the shutter speed dial (the dial on top next to the hot shoe) and the aperture mode switch on the lens, not the camera body. (If you are using a lens that does not have an aperture mode switch, you will need to use the APERTURE SETTING option in the shooting menu. Please consult the owner’s manual for more information.)
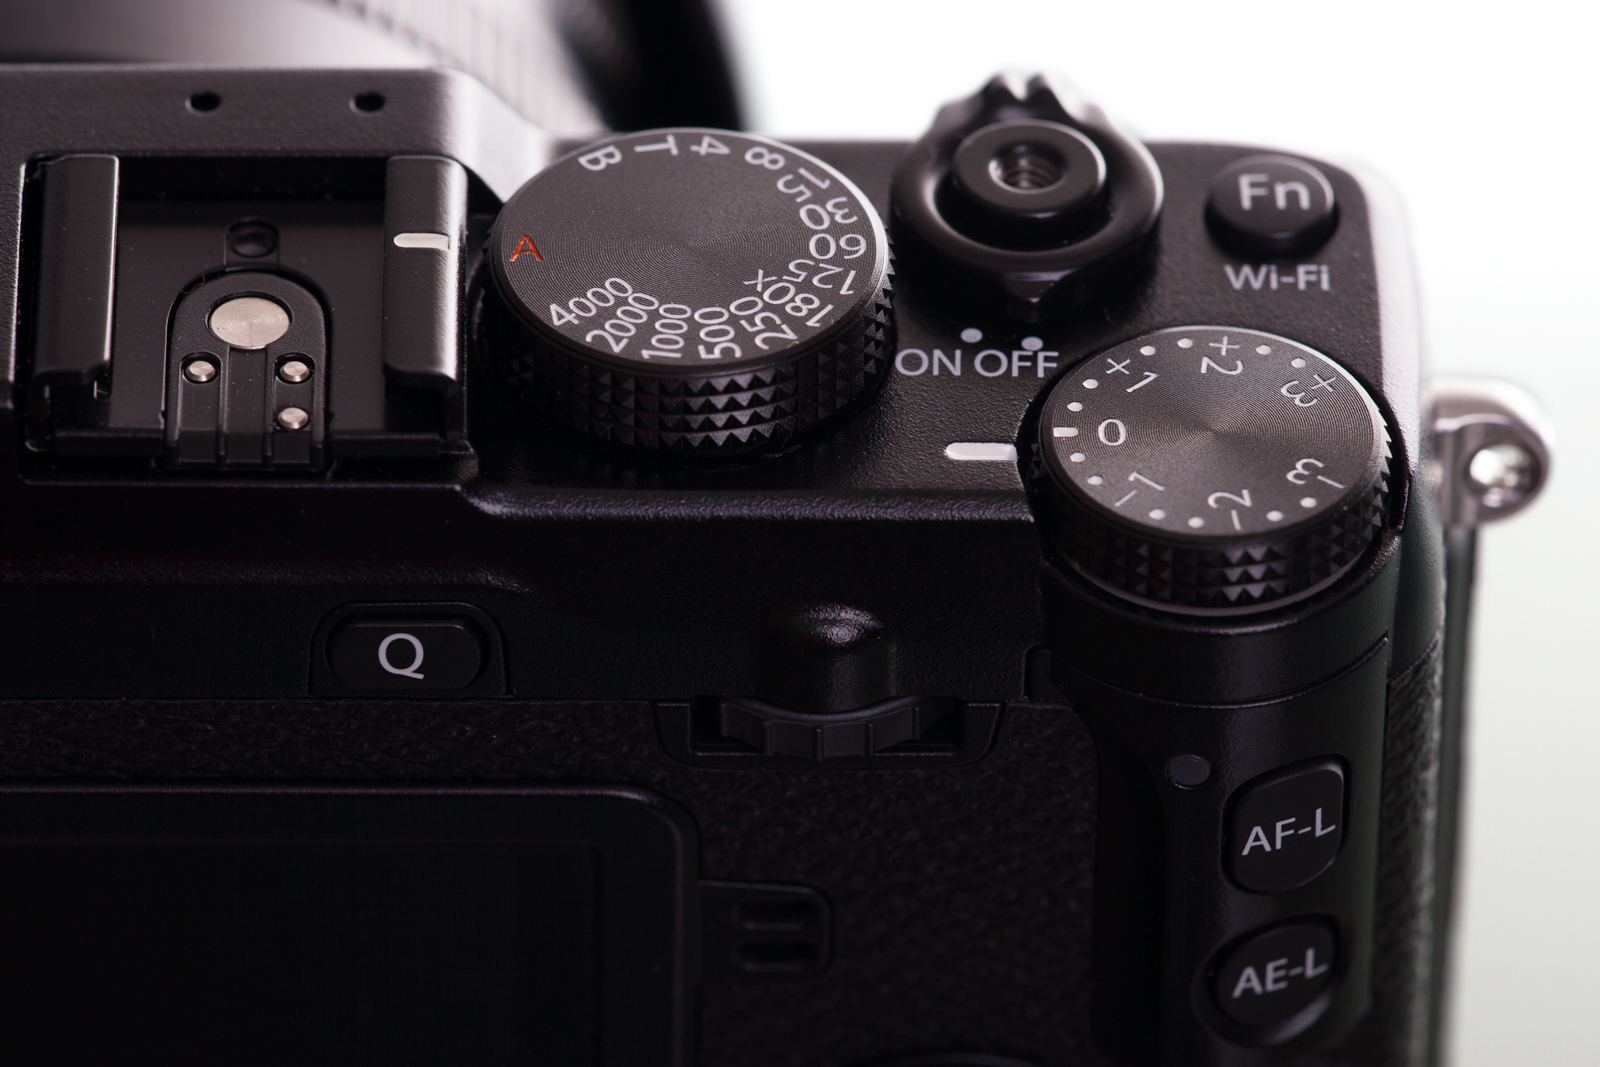
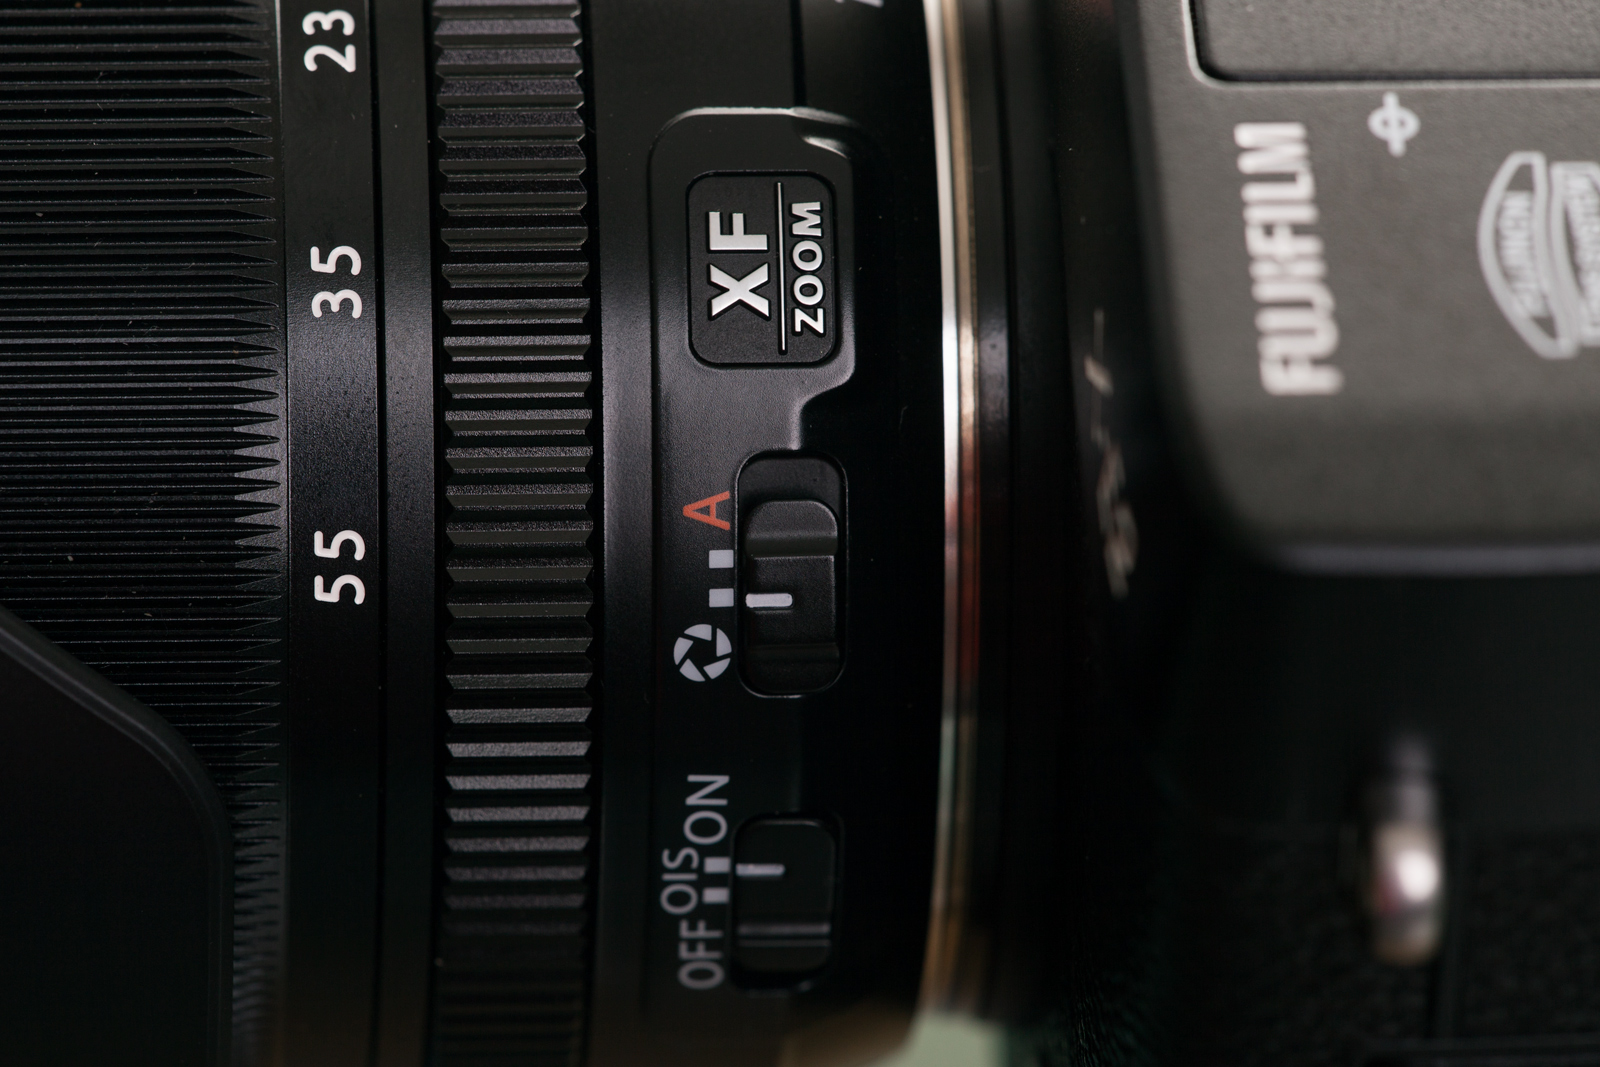
- For Program mode (P), set the shutter speed dial to A, and slide the Aperture mode switch on the lens to the aperture symbol.
- For Aperture priority (A), set the shutter speed dial to A, and slide the Aperture mode switch on the lens to the aperture symbol. Adjust the aperture using the aperture control ring on the lens.
- For Shutter priority (S), slide the Aperture mode switch on the lens to A, and use the shutter speed dial to set your desired shutter speed.
- For Manual (M) mode, slide the Aperture mode switch on the lens to the aperture symbol. Set the desired shutter speed with the shutter speed dial, and control the aperture using the aperture ring on the lens.
I found that I quickly got used to how the X-E2 handles exposure modes and settings, and found it fairly intuitive to use. I didn’t have any problems getting the camera to do exactly what I wanted.
Menus and Setup
The Fuji X-E2 menu system uses the usual Fuji X system. There is a menu button and four navigation buttons to navigate through the options. While it’s not great, it’s not bad, either. I would love a custom menu like Canon has where I could put my most used options. Still, I found it easy to learn my way through the eight screens of menu options (five for shooting and 3 for setup). Some menus options have sub-menus, so the myriad of control settings is nothing short of amazing.
The X-E2 has a Q (quick menu) button where you can quickly access some of the options like image format (RAW and/or JPEG), aspect ratio, film simulation, ISO, white balance and more. Unfortunately, you can’t choose which options to show in the quick menu.
There’s a different set of menus in Playback Mode where you can set up a wireless connection to your phone, tablet or desktop; convert RAW to JPEG in camera; and do some other basic image editing like crop and resize.
Wireless is pretty useful if you want to copy images (RAW, JPEG or both) to your desktop without taking the SD card out of the camera. You can also share images on the spot with your phone or tablet. Note that if you shoot RAW only, you’ll have to convert the images to JPEG using the X-E2’s built-in RAW file converter before the mobile apps can receive them. It would be nice if the camera could do this automatically, but then again, it’s not a major problem.
Focus and Operation speed
While the X-E2 is certainly slower than a DSLR where shutter lag and focus lock speed are concerned, it’s not a problem unless you’re shooting fast moving subjects. These cameras are ideal for landscape, portraiture and street photography, but wildlife and sports photographers may have to hold their breath for a while longer before these mirrorless cameras deliver the high-speed performance of their DSLR counterparts. That said, the guys from TheCameraStoreTV have done some testing with different mirrorless cameras along with a top-of-the-line Nikon D4S. The results may surprise you.

EVF vs. Optical Viewfinder
The EVF and back LCD can be used with the proximity sensor, which allows the camera to alternate between them depending on if you are looking through the viewfinder or holding the camera at arms’ length. You can also select an option to use only one of them.

On the X-E1 there is a “View Mode” button that allows you to change between viewing modes on the fly. For some reason, Fuji thought it was a good idea to get rid of it on the X-E2, so now you have to either go through the menus to change it, or set a custom function button (there are 4 of them) on the camera to access that menu option directly. Neither option is as practical as the original X-E1 solution.
Also, I wish there was a way to use the EVF for shooting only and the LCD screen for menus and reviewing images. I don’t like shooting using the LCD, but I have a hard time using the EVF for navigating the menus and image reviewing. I end up having to keep the camera on Eye Sensor mode with both screens, which ultimately leads to faster battery drain.
I haven’t had a camera with an EVF since my old and beloved Olympus C2100UZ a good 12 years back. I have tried a Sony Alpha 77, but found it dreadful compared to the Optical Viewfinder of my Canon DSLRs. But Fuji has done a pretty good job here. Once I upgraded to the latest firmware (2.10 at the time of this post), there’s barely any lag, the EVF is big and bright, and the amount of information you can have on screen is very useful. As a plus, you have real-time exposure simulation on screen, which allows you to effortlessly get well-exposed images.
However, in a studio setting using strobes and modeling lights, you will have to turn off Preview Exposure in Manual Mode, which can be found in SET-UP Menu 1 (blue menu) under SCREEN SET-UP. Why? In a studio setting, all the camera can see in terms of the exposure is what the modeling lights provide, but it won’t see what the strobes output. Therefore, you will have to shoot in manual mode and set the exposure for what your strobes will output. If the camera is using exposure preview and you have your strobes set, as an example, to 1/125 @ F8 and ISO 200, leaving exposure preview turned on will result in a black EVF or LCD display, making composition impossible.
Image Quality
This is where Fuji X cameras really shine. Image quality is incredibly high and, in my opinion, on par with full frame DSLRs. ISO performance puts cameras like the Canon EOS 7D (or any other APS-C I’ve tried) to shame.
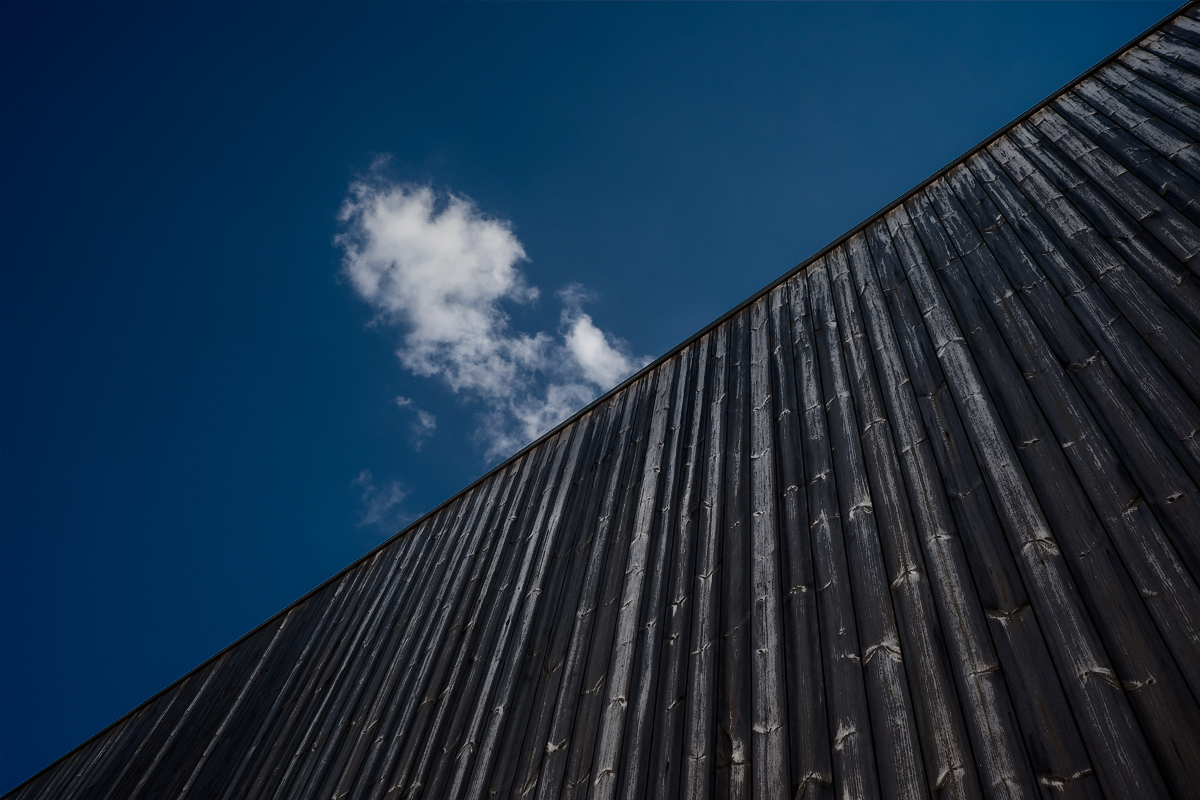
The dynamic range is also very good. Shadows and highlights hold information very well, with barely any noise or artifacts.


RAW and JPEG
RAW images, as you might expect, will give you the most control and the greatest flexibility as far as correcting exposure, shadows, highlights and so on. What is most surprising about the X-E2, though, are its JPEG images.

My Canon EOS 5D Mark II can deliver incredible images in RAW, but its JPEGs are weak. Of course, this has to do with the processing algorithms implemented. Fuji’s JPEGs are just jaw dropping: clean, detailed and with the much loved Fuji color.
As with other Fuji X cameras, the X-E2 has what Fuji calls “Film Simulation,” which will emulate Provia, Velvia and Astia films, as well as some black and white modes. The Velvia Simulation is especially vivid and bright without looking over the top.
At high ISO, in JPEG, though, the camera seems to overprocess noise, especially on skin tones, but anything below ISO 3200 looks impressively good.
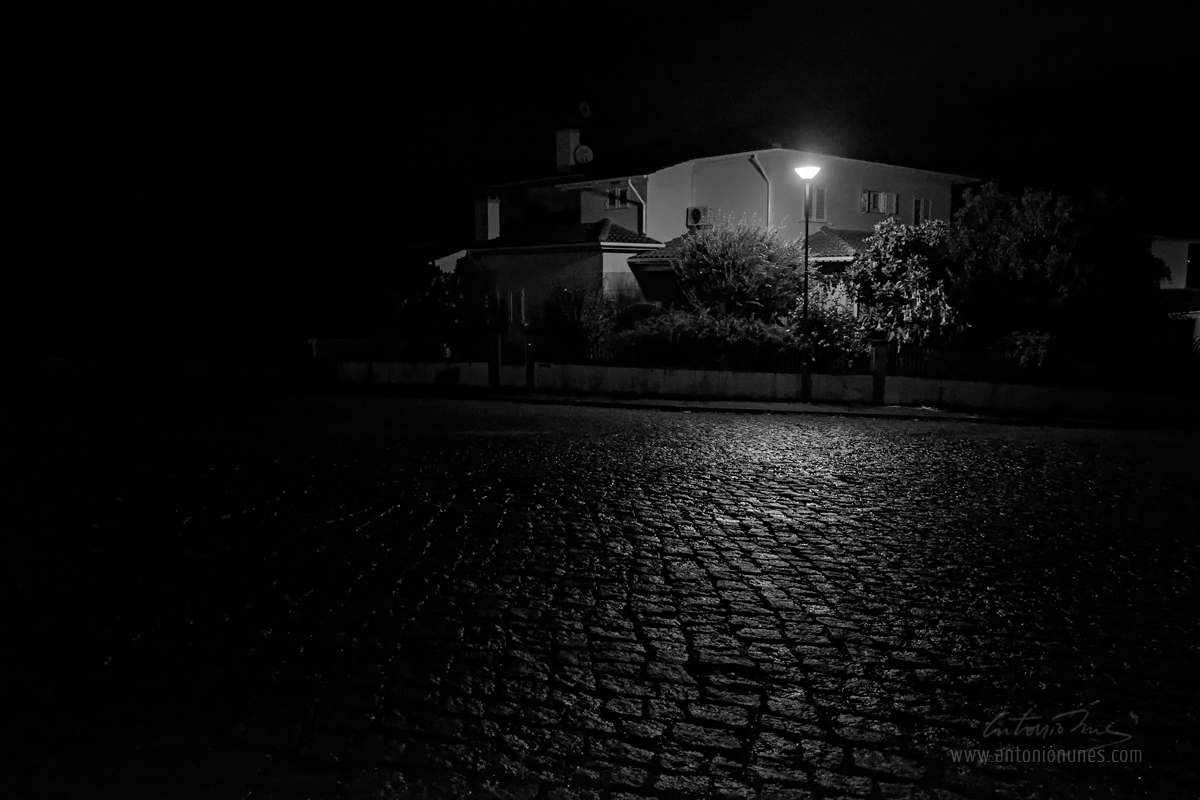
ISO Performance
ISO performance on this camera is a real WOW factor, so much so that I’ve set the camera to Auto ISO (with Maximum Sensitivity set ISO 3200), and I’m not slightly worried about the results.


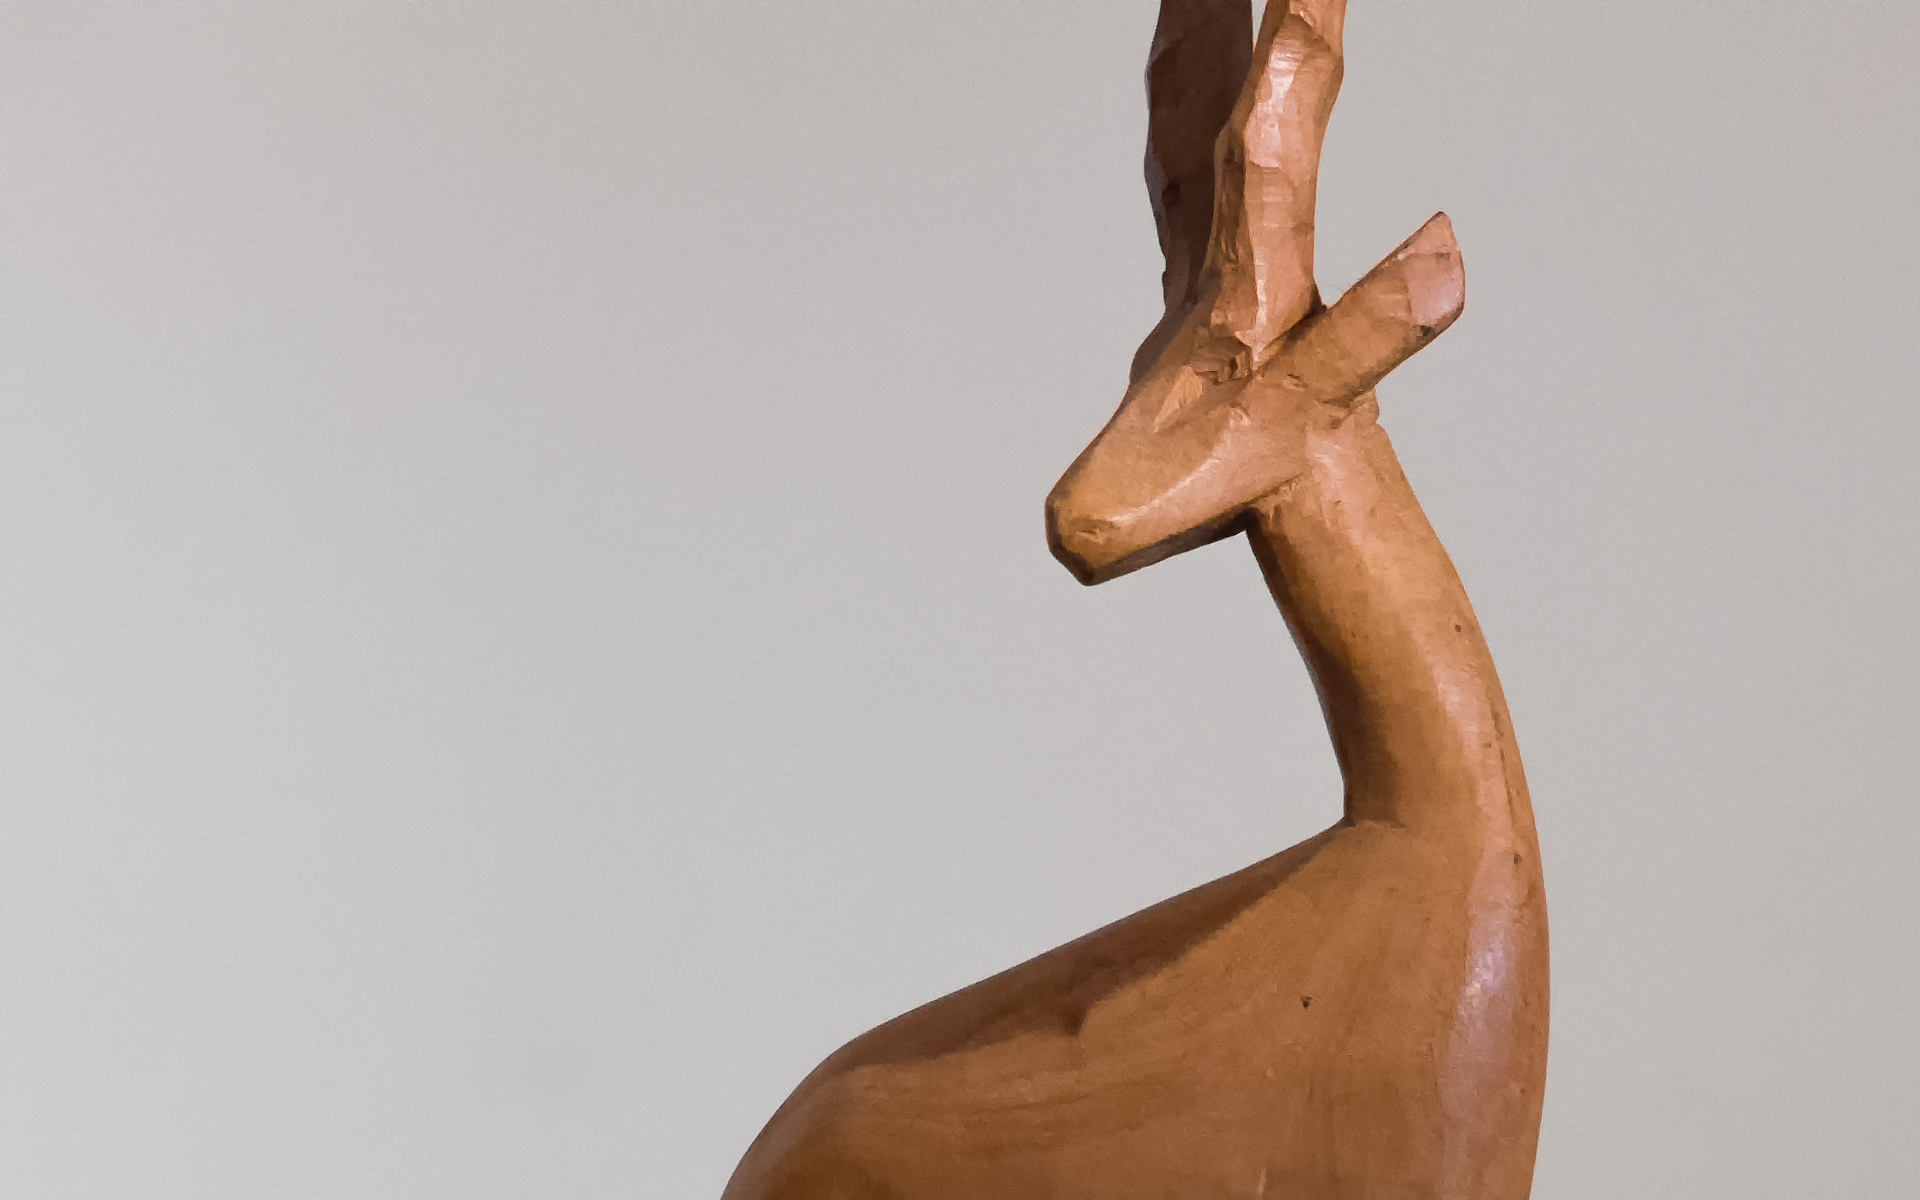
As you can see from the example above, even unprocessed, noise at ISO 3200 is nice and even. After noise reduction and some sharpening, detail holds up really well.

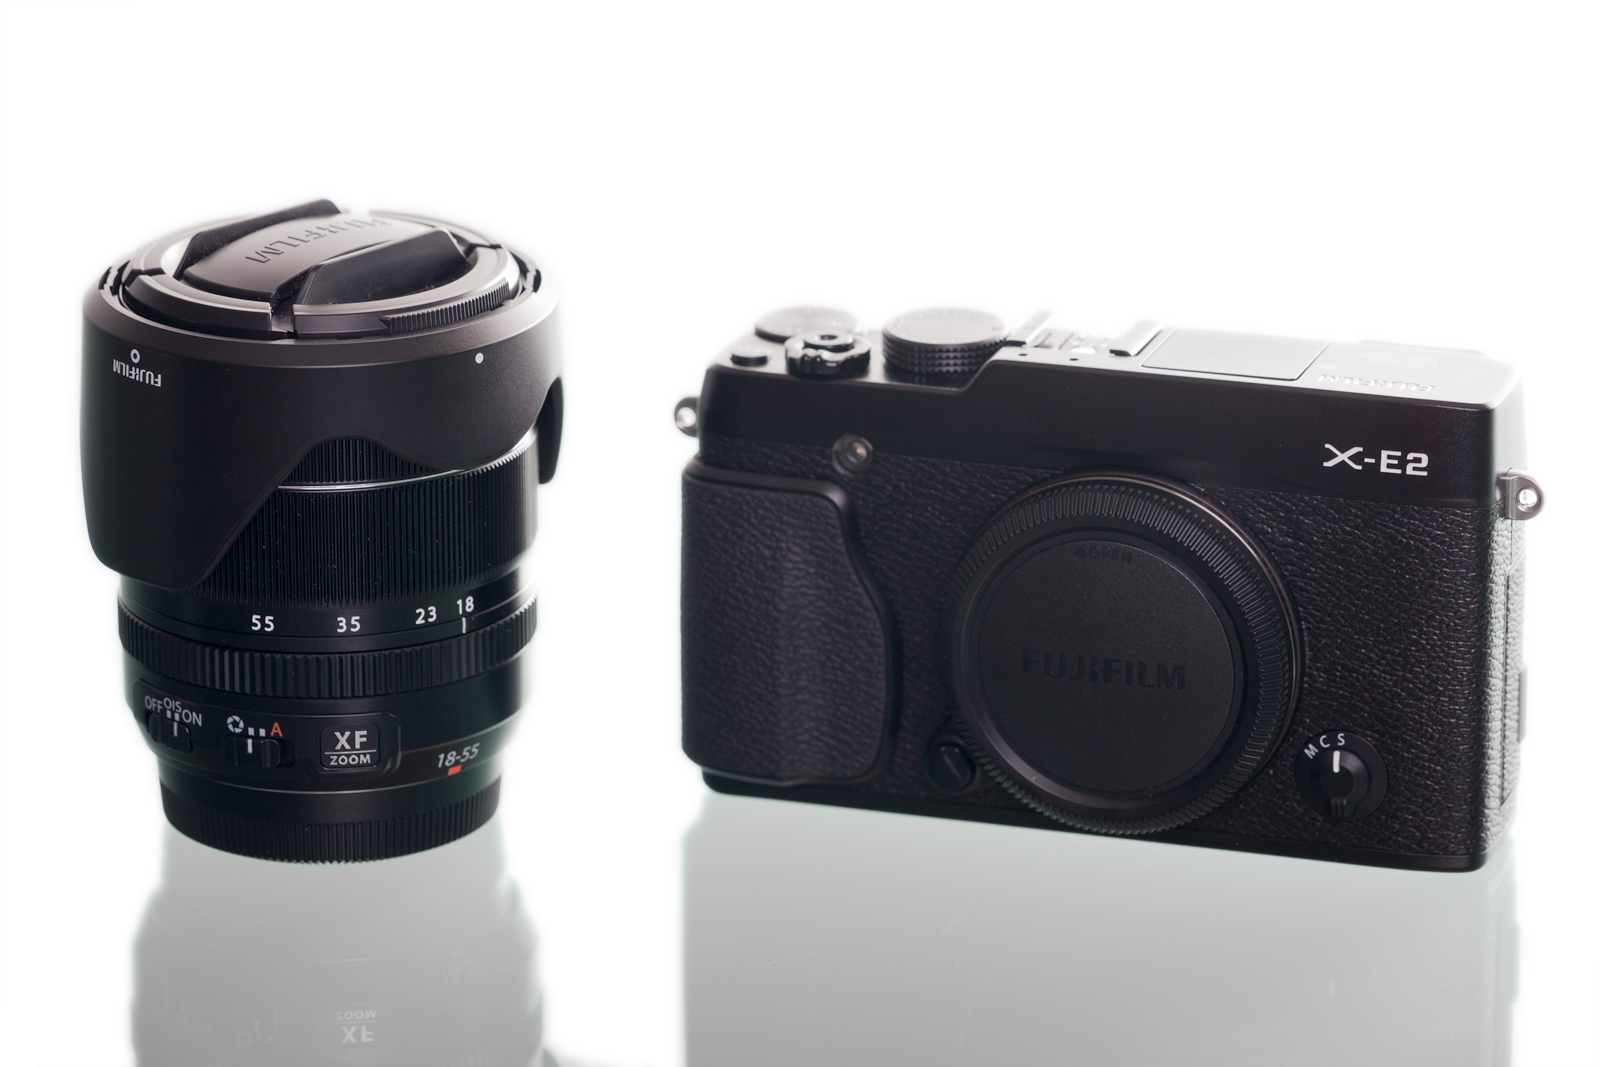
The Kit Lens – Fuji XF 18-55 F2.8-4 R LM OIS
Kit lenses aren’t usually a photographer’s dream. Poor build, doubtful image quality and slow focusing are common complaints.

The Fuji XF 18-55 F2.8-4 R LM OIS (27-84mm in 35mm format equivalent), though, isn’t your regular kit lens. Its solid build (even if it’s not weather sealed), fast focusing and great image quality even when shooting wide open (F2.8 at 18mm and F4 at 55mm) set it apart from the rest of the herd. It’s also a relatively fast lens with its max apertures matching many lenses that are usually much more expensive. It retails in Europe for about 400€ and USD 600$ across the pond.

Being a XF series lens, it’s expected to perform well, but having it available as a kit lens is a brilliant move by Fuji and, of course, a plus for new owners.
The Image Stabilization also performed very well and I’ve been able to shoot as low as 1/4 @ 18mm and 1/8 @ 55mm, handheld.
Conclusion
The Fuji X-E2 is an impressive camera. Image quality is excellent, even moreso if you consider it’s an APS-C sized sensor. It’s also a joy to use. Controls make sense and are easy to use, the EVF is amazing, and, most importantly, I can carry it anywhere with ease. Taking photos is fun again.

Likes
- Well-built, light and small
- Excellent image quality
- Great color rendition and metering
- Amazing high ISO performance
- Controls are well thought out and fun to use
- Even if you never shoot, it’s beautiful to look at 🙂
Dislikes (little nags, really)
- Top dials can be stiff and hard to turn with one hand
- Back buttons are a bit flimsy compared to the camera’s overall built quality
- I really wish there was a View Mode button
Limitations
- Shutter speed is limited to 1/4000 and can fall short in bright conditions at big apertures. (You can easily work around this by using an ND filter.)
- No tilt/swivel display. It’s not a deal breaker, but it would surely be nice to have.