
Since the darkroom times, dodging and burning—that is, emphasizing areas of an image by darkening (burning) or lightening (dodging) them—have been indispensable tools to help photographers realize their artistic vision.
In the darkroom, masks are used during the printing process to selectively reduce or increase exposure to light in specific areas of an image. In the digital world, we can do this in post processing using tools like Adobe® Photoshop®.
There are several ways to do dodging and burning. Even though Photoshop® has dedicated dodge and burn tools, they work in a destructive way—you can’t reverse them once applied. In this tutorial, I’ll share one of my favorite methods of dodging and burning by creating separate layers in a non-destructive and highly controllable process.
I’m using Photoshop® CS6 for this tutorial, but the method applies to previous versions of Photoshop®, and even to other digital imaging software packages that support layers, such as Gimp.
Let’s get started.
Create the Dodge and Burn layers
First, we’ll create two empty layers where we’ll paint using black (for burning) or white (for dodging), and then we’ll use the Soft Light blending mode and opacity adjustments to achieve our final result.
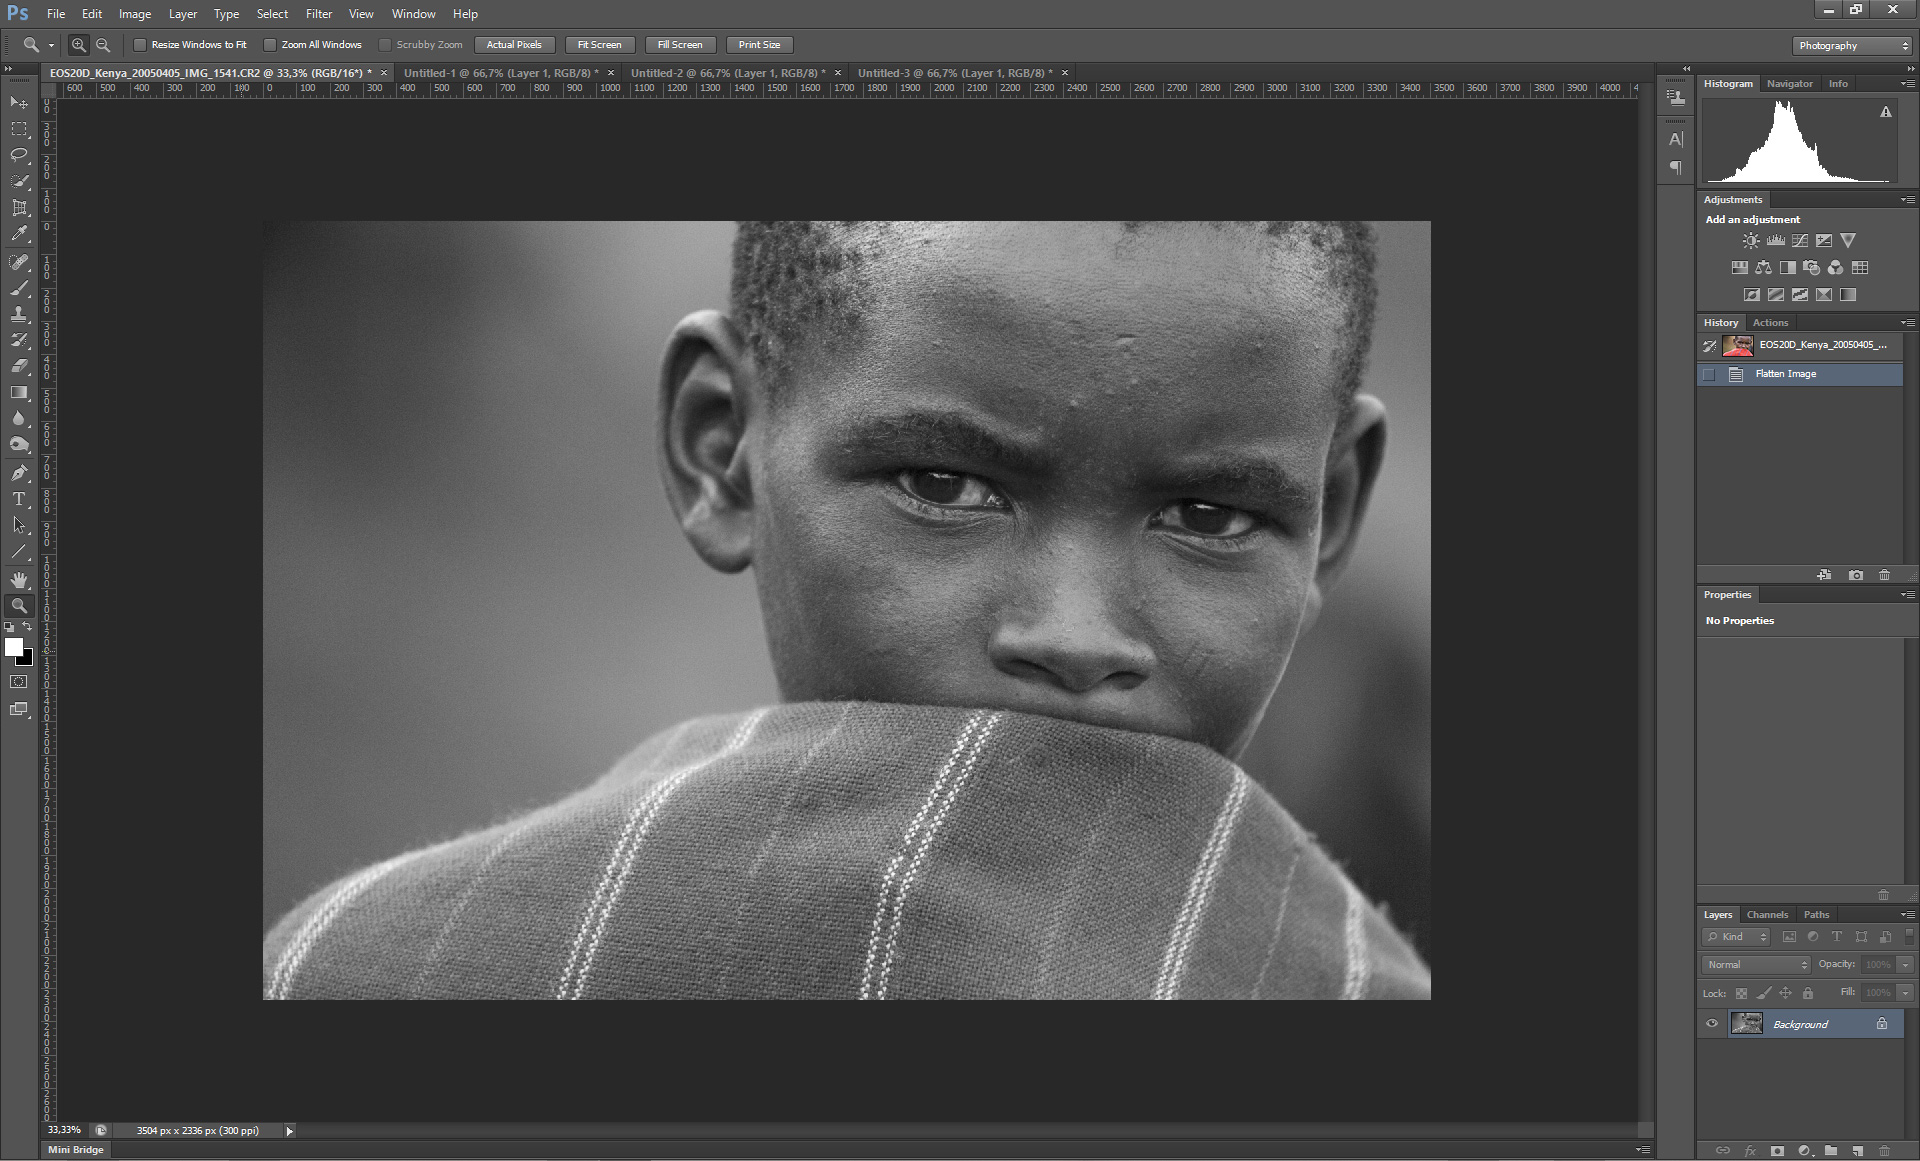
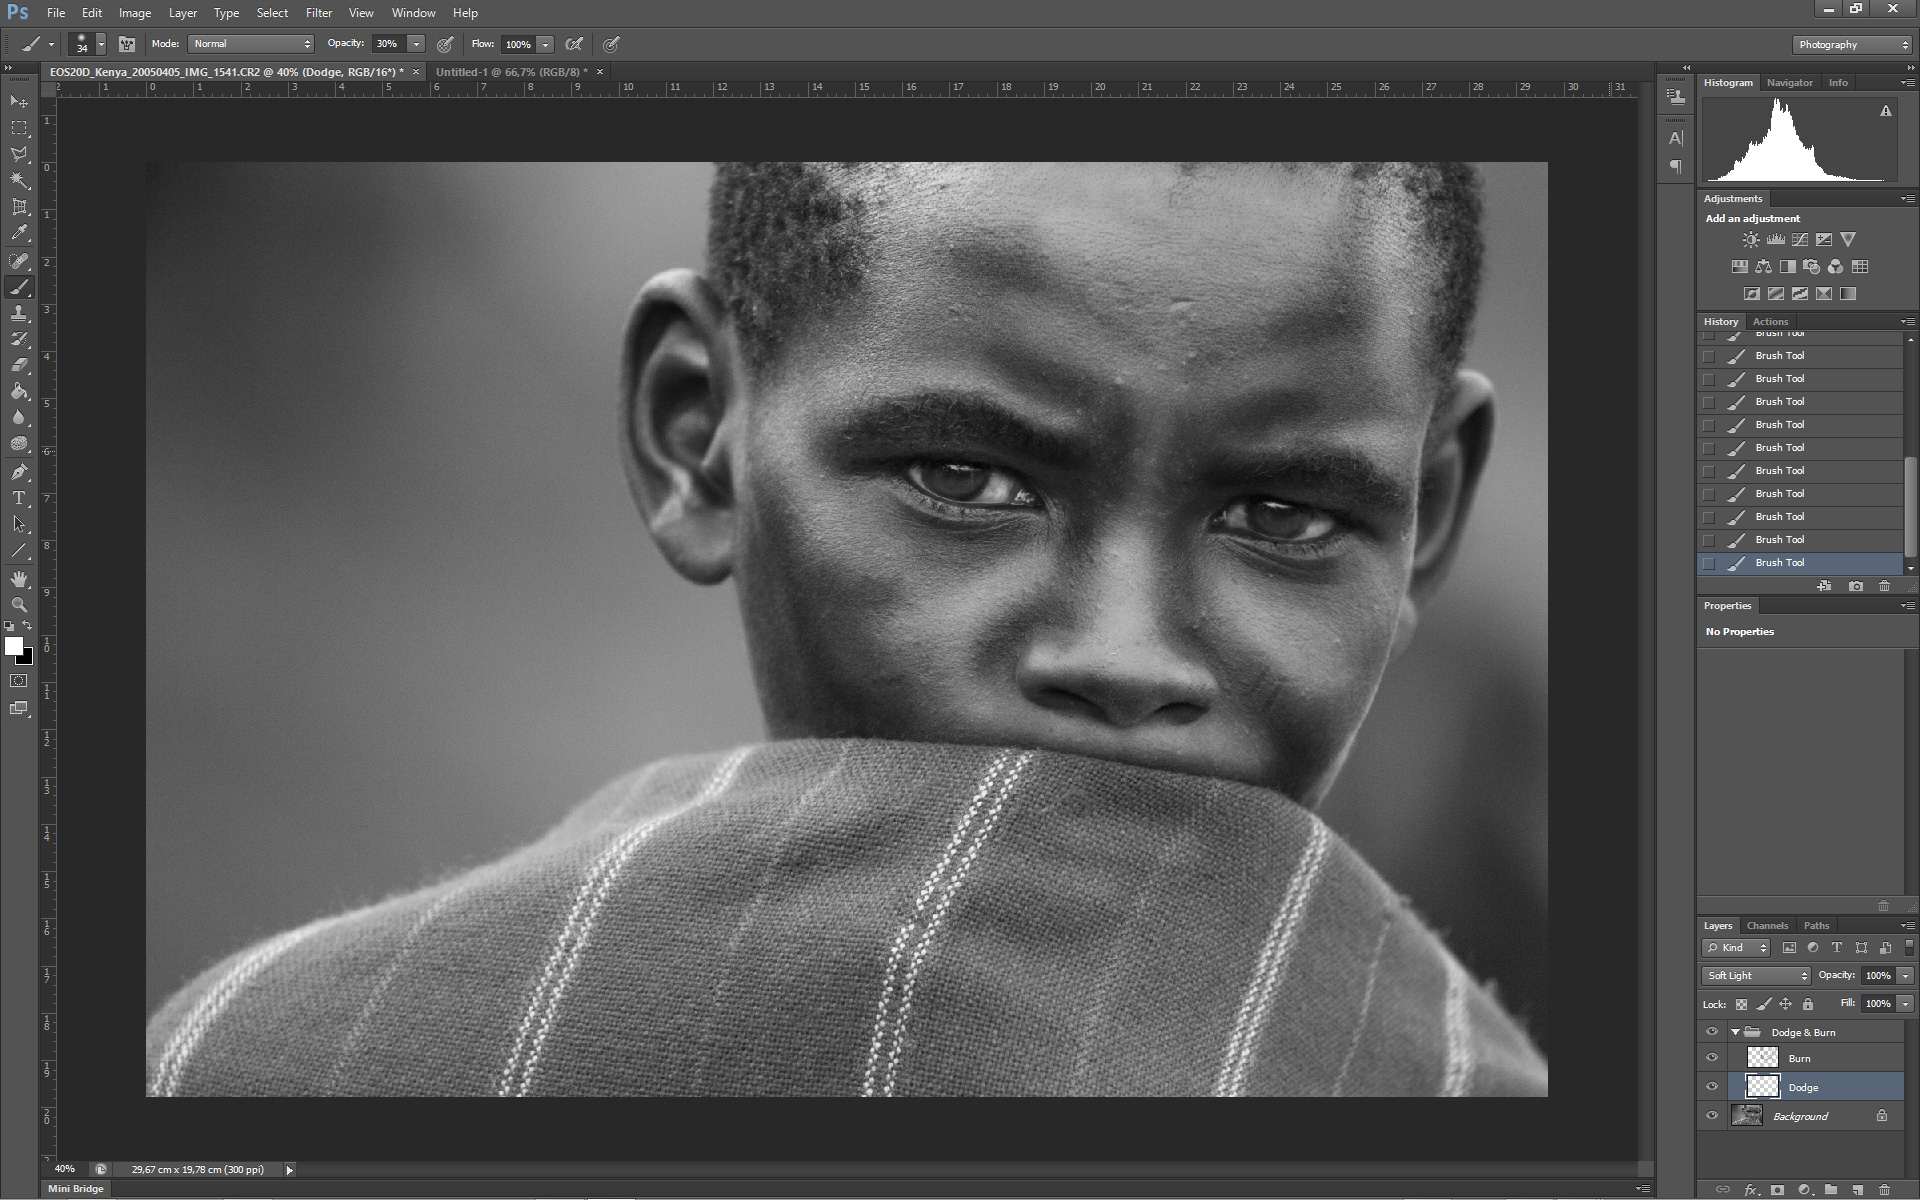
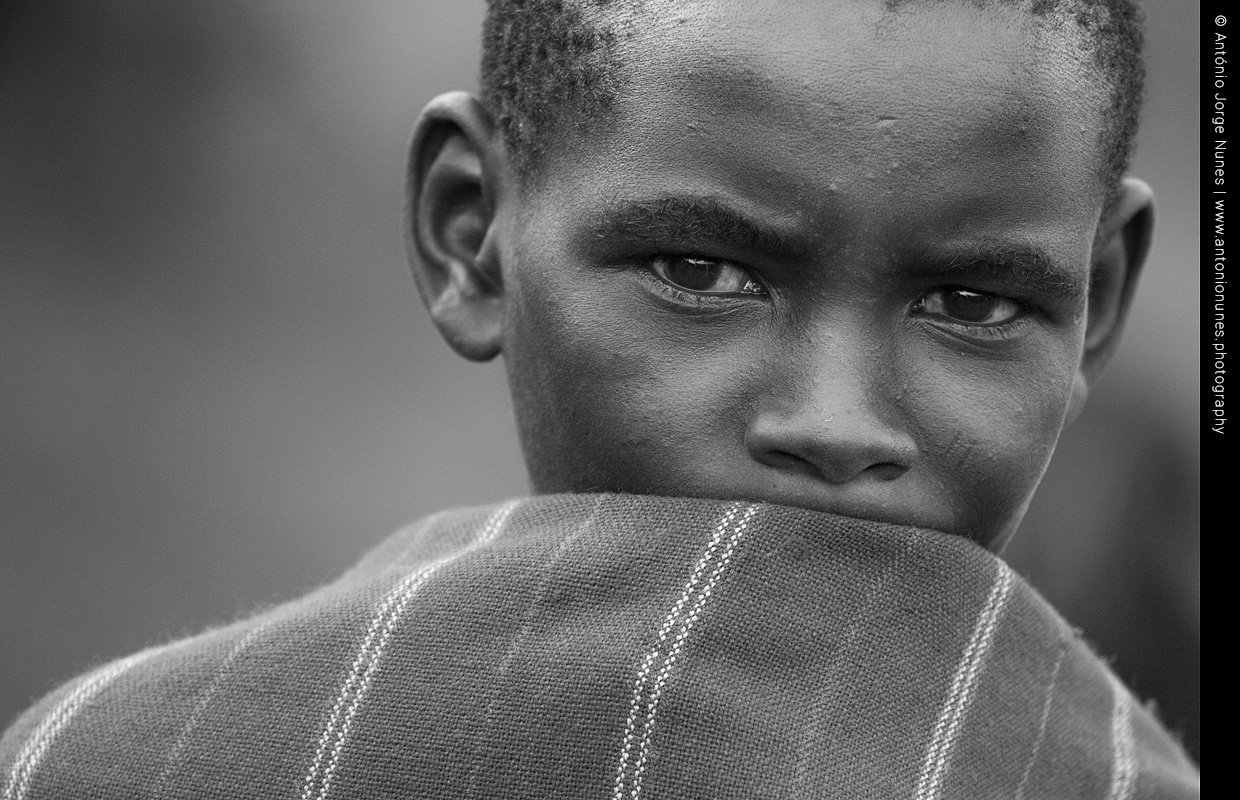
The image shown below has been converted to black and white with no other enhancements. (Of course, you can dodge and burn color images as well. It’s a matter of personal preference.)
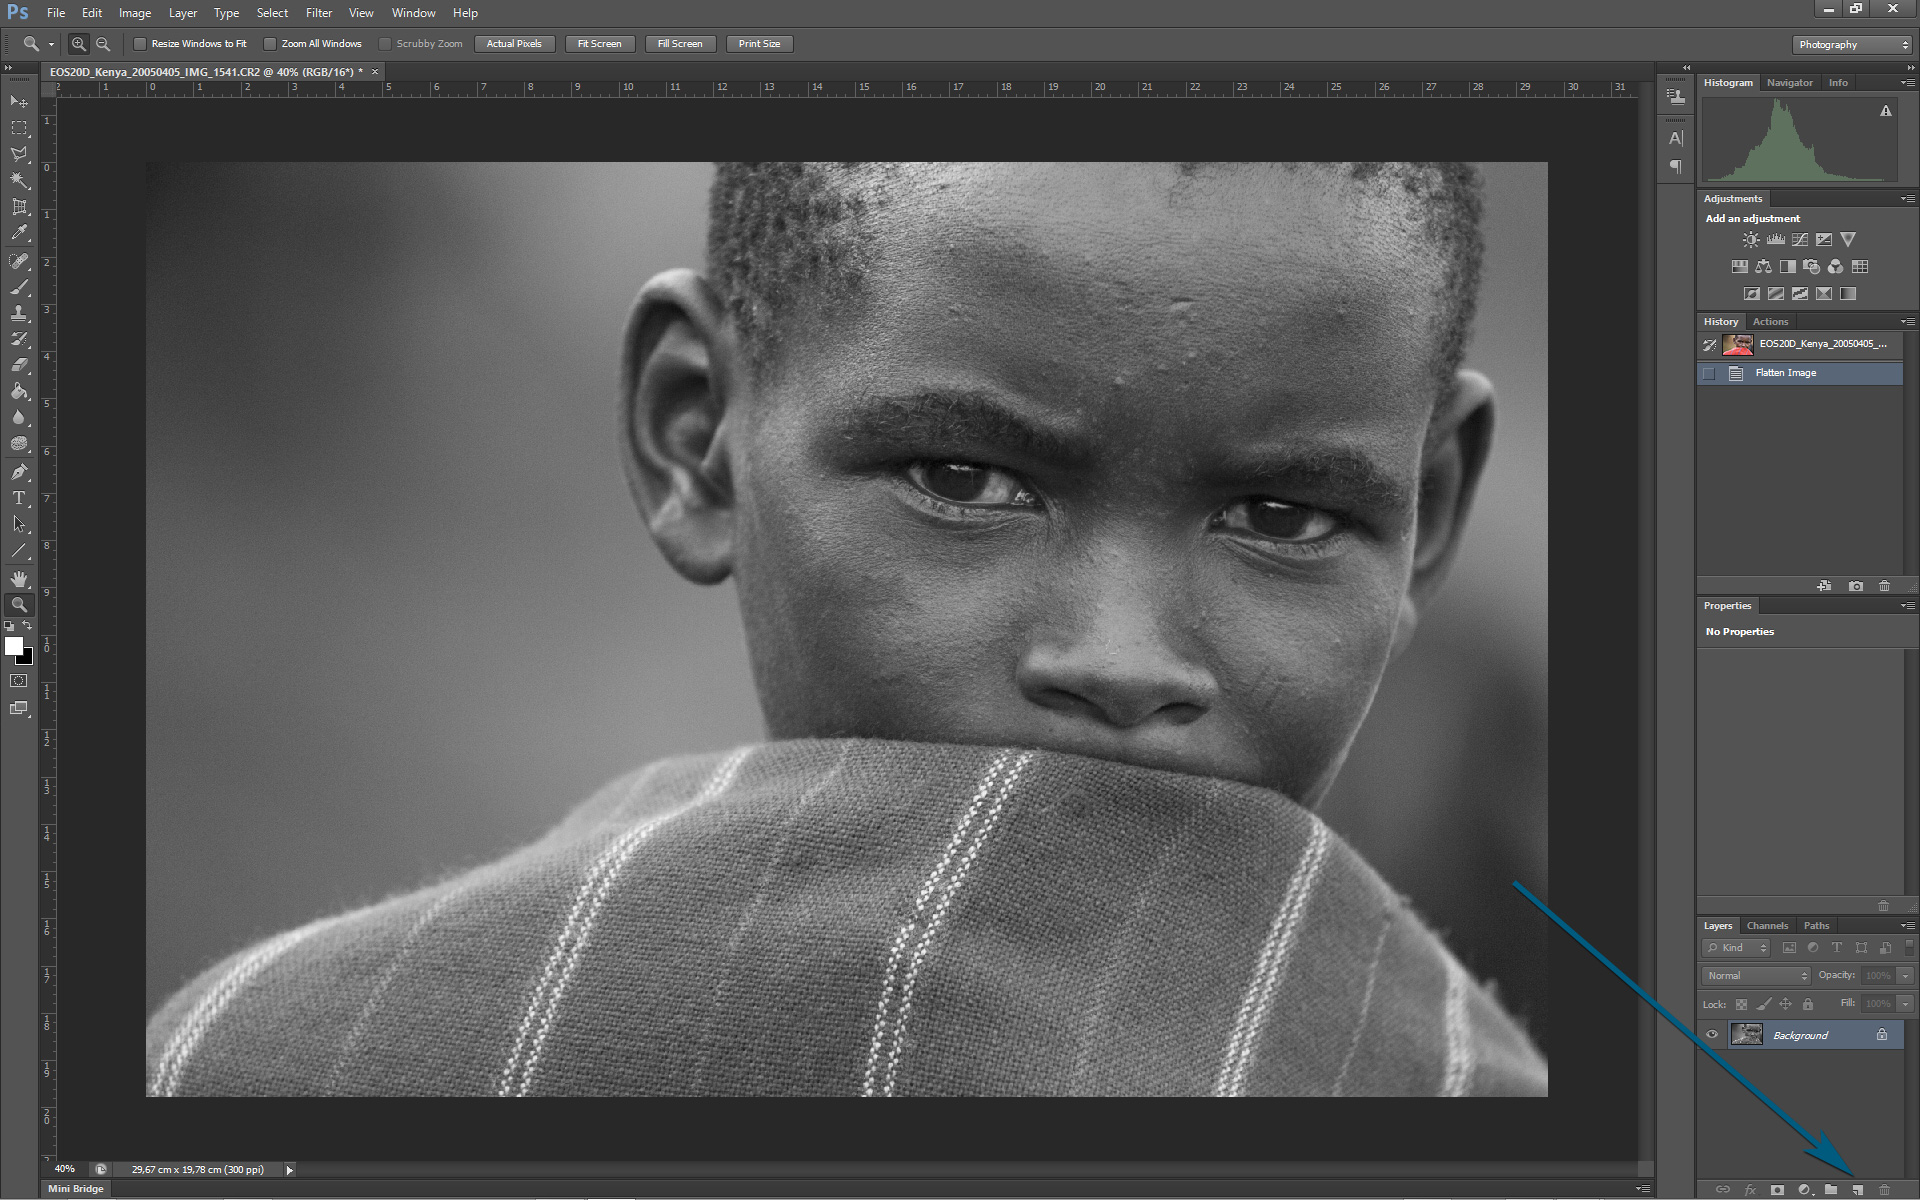
1. Click the Create a new layer button in the Layers panel as shown in the image below. You can also press Ctrl-Shift-N on a PC or Command-Shift-N on a Mac.
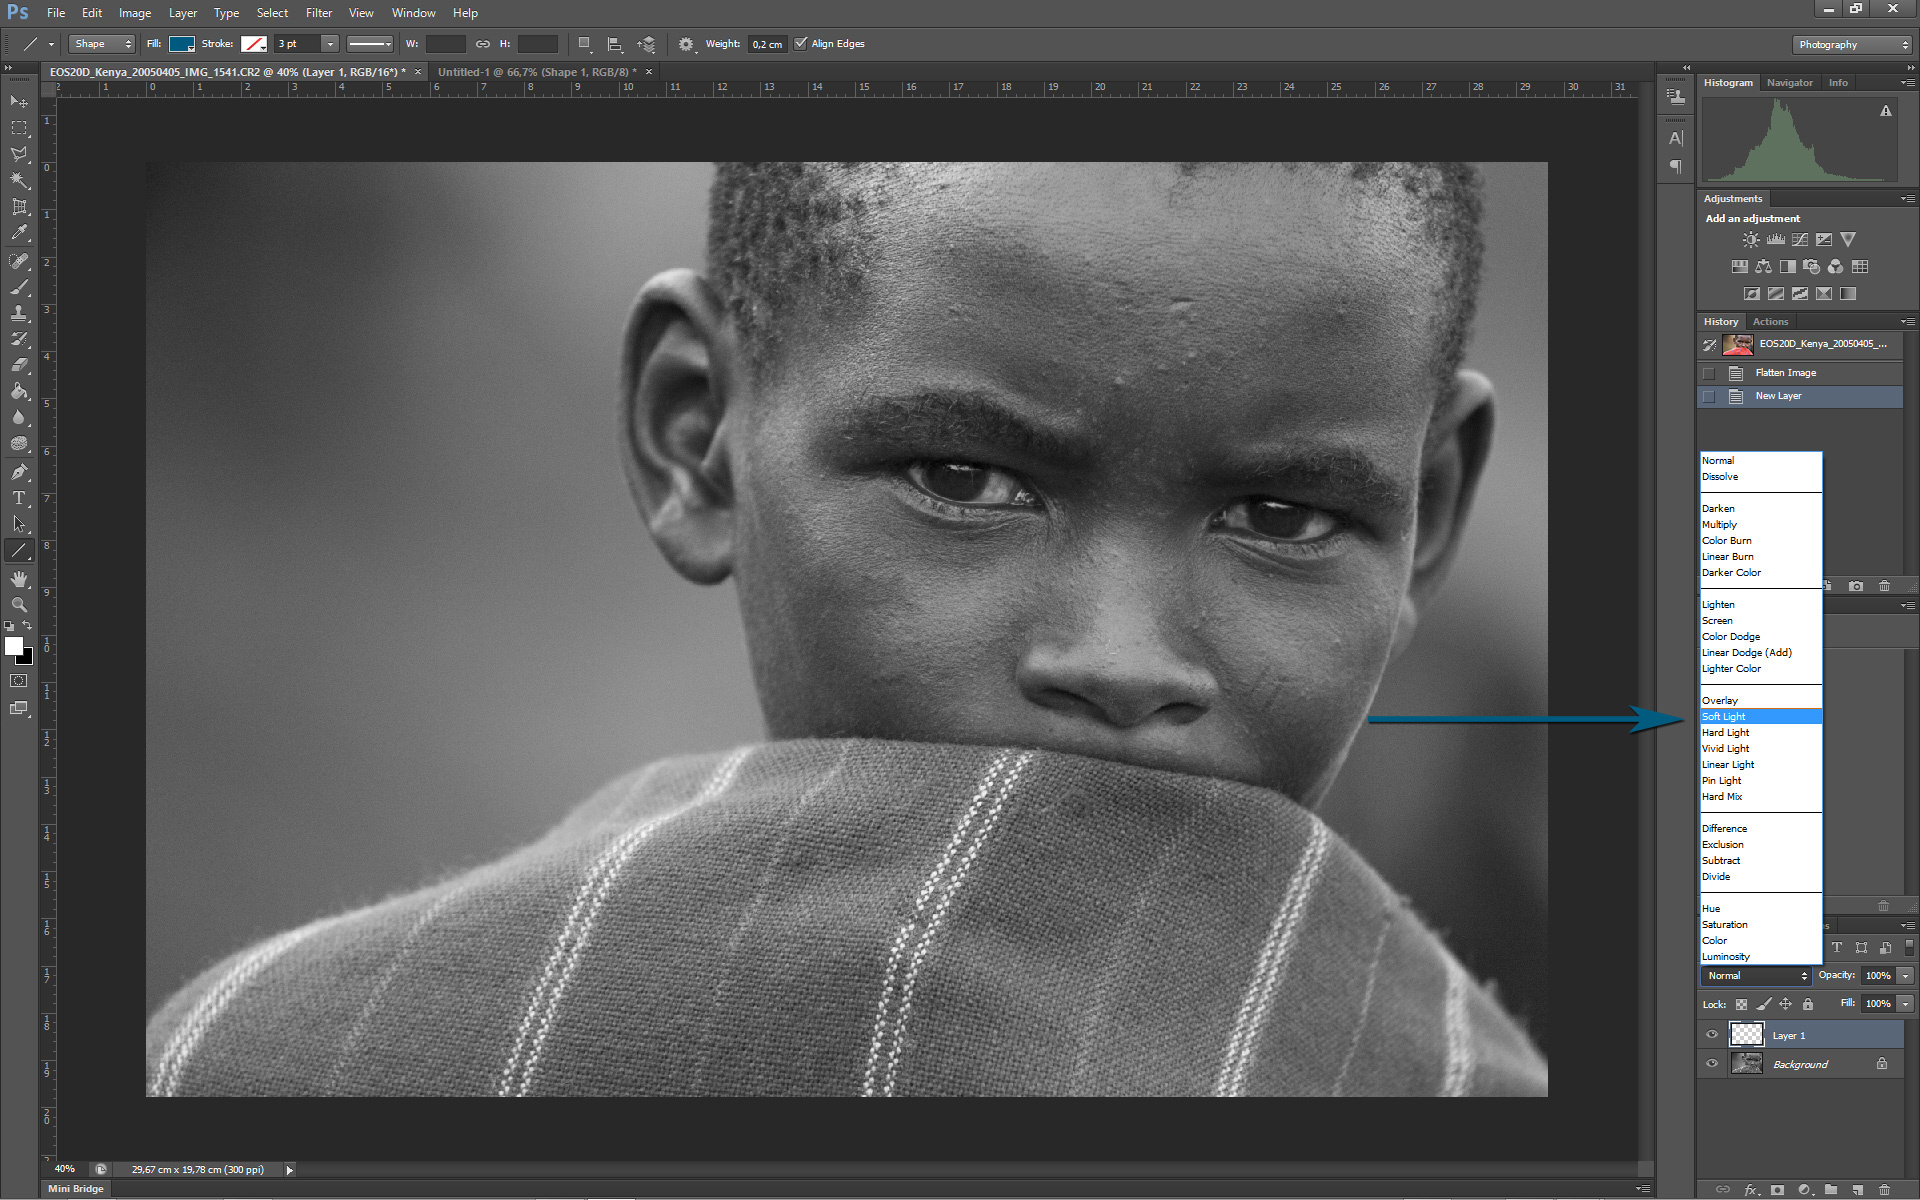
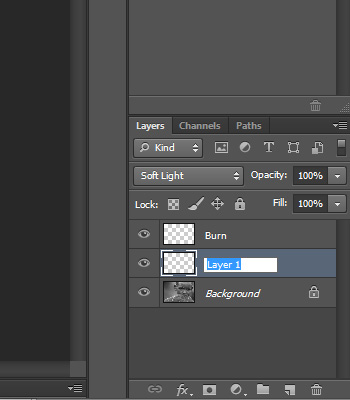
2. Change the new layer’s blending mode to Soft Light by selecting it from the drop-down list as shown below:
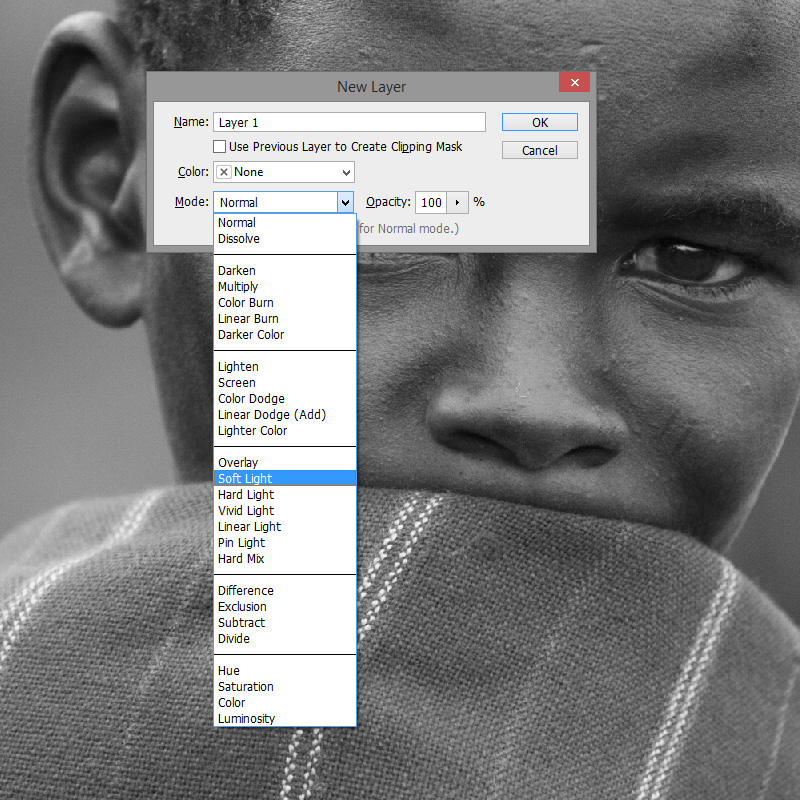
If you chose to create the new layer in step 1 with the keyboard shortcut, you can avoid step 2 by selecting the Soft Light blending mode in the New Layer dialog box.
3. Duplicate Layer 1 by pressing Ctrl-J on a PC or Command-J on a Mac. You will now have two layers with the blending mode set to Soft Light on both. (You can also drag the recently created Layer 1 to the New Layer button to duplicate it).
 4. Rename the layers so you’ll know which one is which:
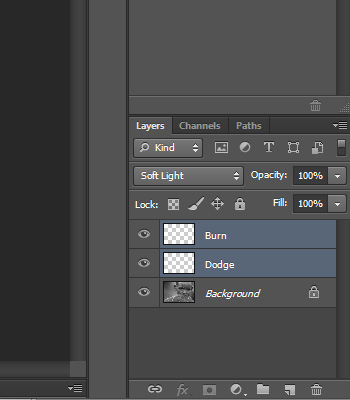
- 4.1. Double-click on Layer 1 copy to highlight it. Enter a new name such as Burn, and press Enter/Return to apply the new name. (Alternatively, instead of pressing Enter/Return, you can also press Tab to apply the new name and automatically jump to Layer 1. Its name field will already be highlighted for you.)
4.2. Double-click on Layer 1 to highlight it, and enter a new name such as Dodge. Press Enter/Return to accept the new name.
5. Select both layers by holding down the Shift key and clicking on both layers.
 6. Group the two layers by pressing Ctrl-G on a PC or Command-G on a Mac.
 7. Rename the group by double-clicking the group’s name and entering a new name, such as Dodge & Burn. Press Enter/Return to accept the new name.
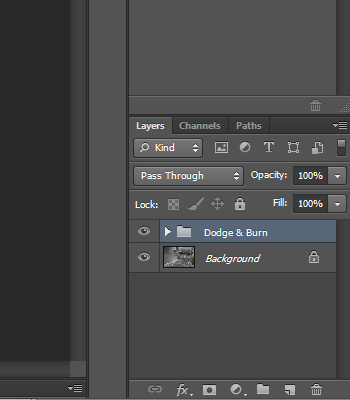
We now have a group of layers called Dodge & Burn with the Dodge and Burn layers inside. The blending mode for both layers is set to Soft Light.

To save time, I created an action you can download and load into Photoshop. It will create the layers and group with one click. 😉
Dodging and Burning with the Brush Tool
8. Select the Brush Tool in the Tools Panel (or press B). Once the Brush Tool is selected, change the brush’s opacity to 30%.
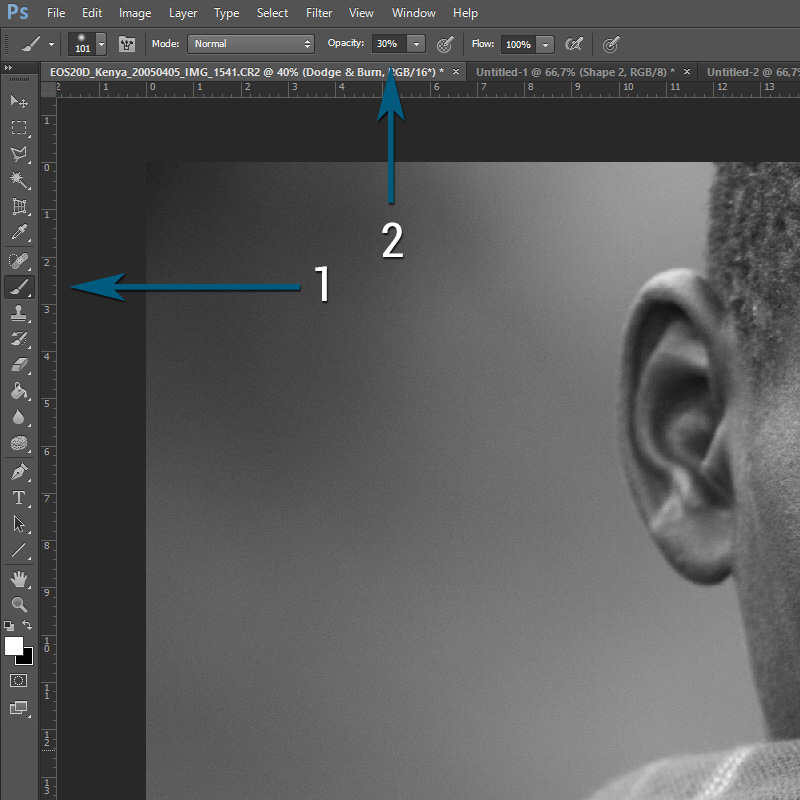 You can use different opacity levels if you would prefer. When “painting” over the image, using a lower opacity, say 15%, will require you to use more brush strokes to achieve the same result. Of course, you’ll also have more control.
9. Select the Burn layer that you created earlier in the Layers Panel.
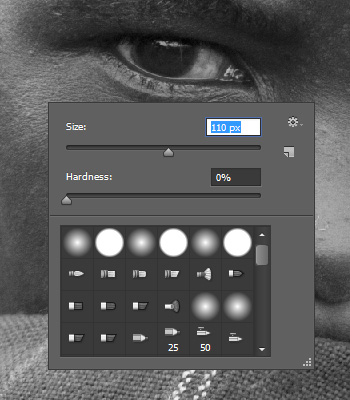
10. Right-click (Control-click on a Mac) anywhere on the image to open up the Brush Preset menu and select a soft brush. You can change the size of the selected brush by dragging the Size slider to the right or left. I recommend leaving Hardness set to 0%. Place the brush where you want to start burning, hold down the mouse button and start painting. The Brush Preset menu will automatically close as soon as you start painting. Alternatively, you can press the Esc (Escape) key to dismiss it before you start painting.
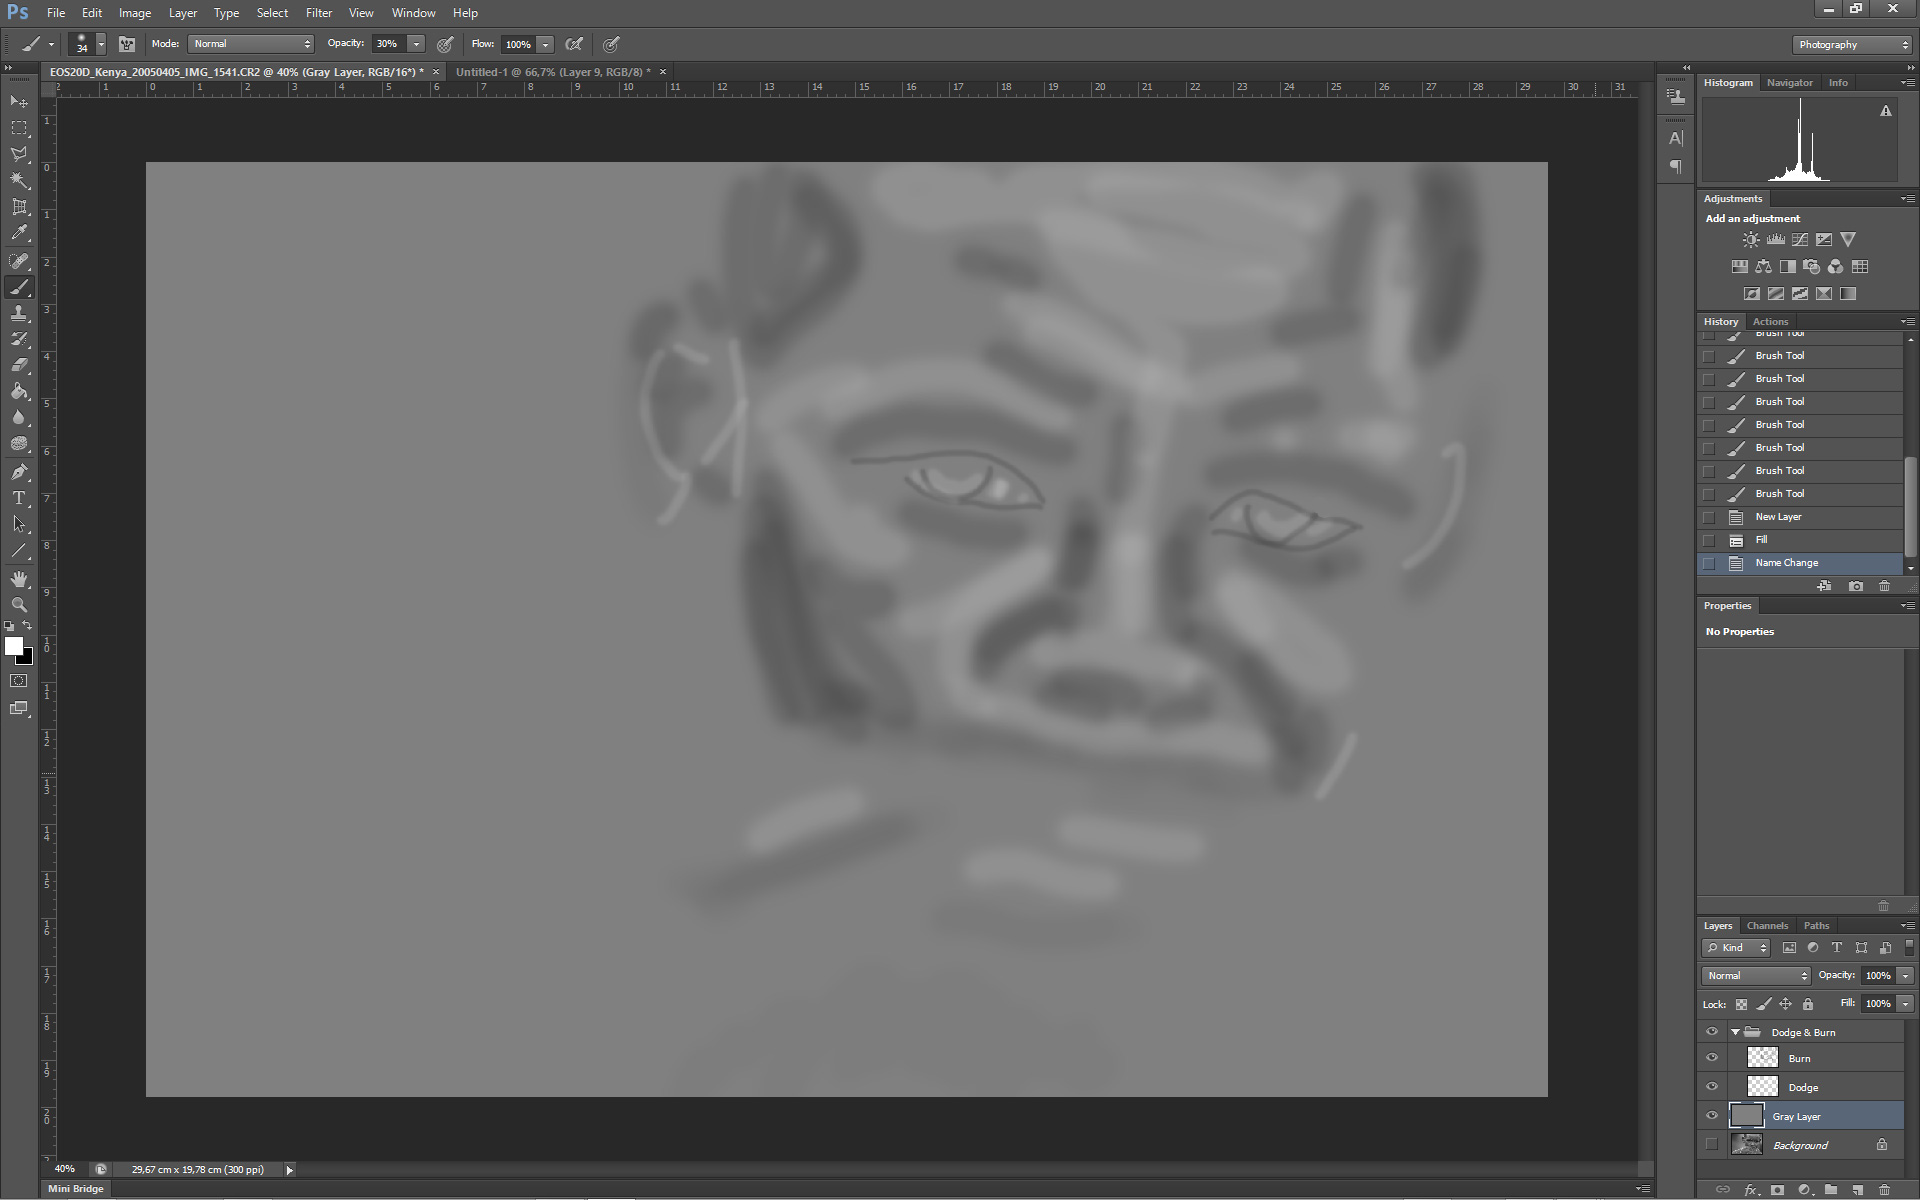
In this case, I painted over the darker areas of the face, with a large and soft brush.
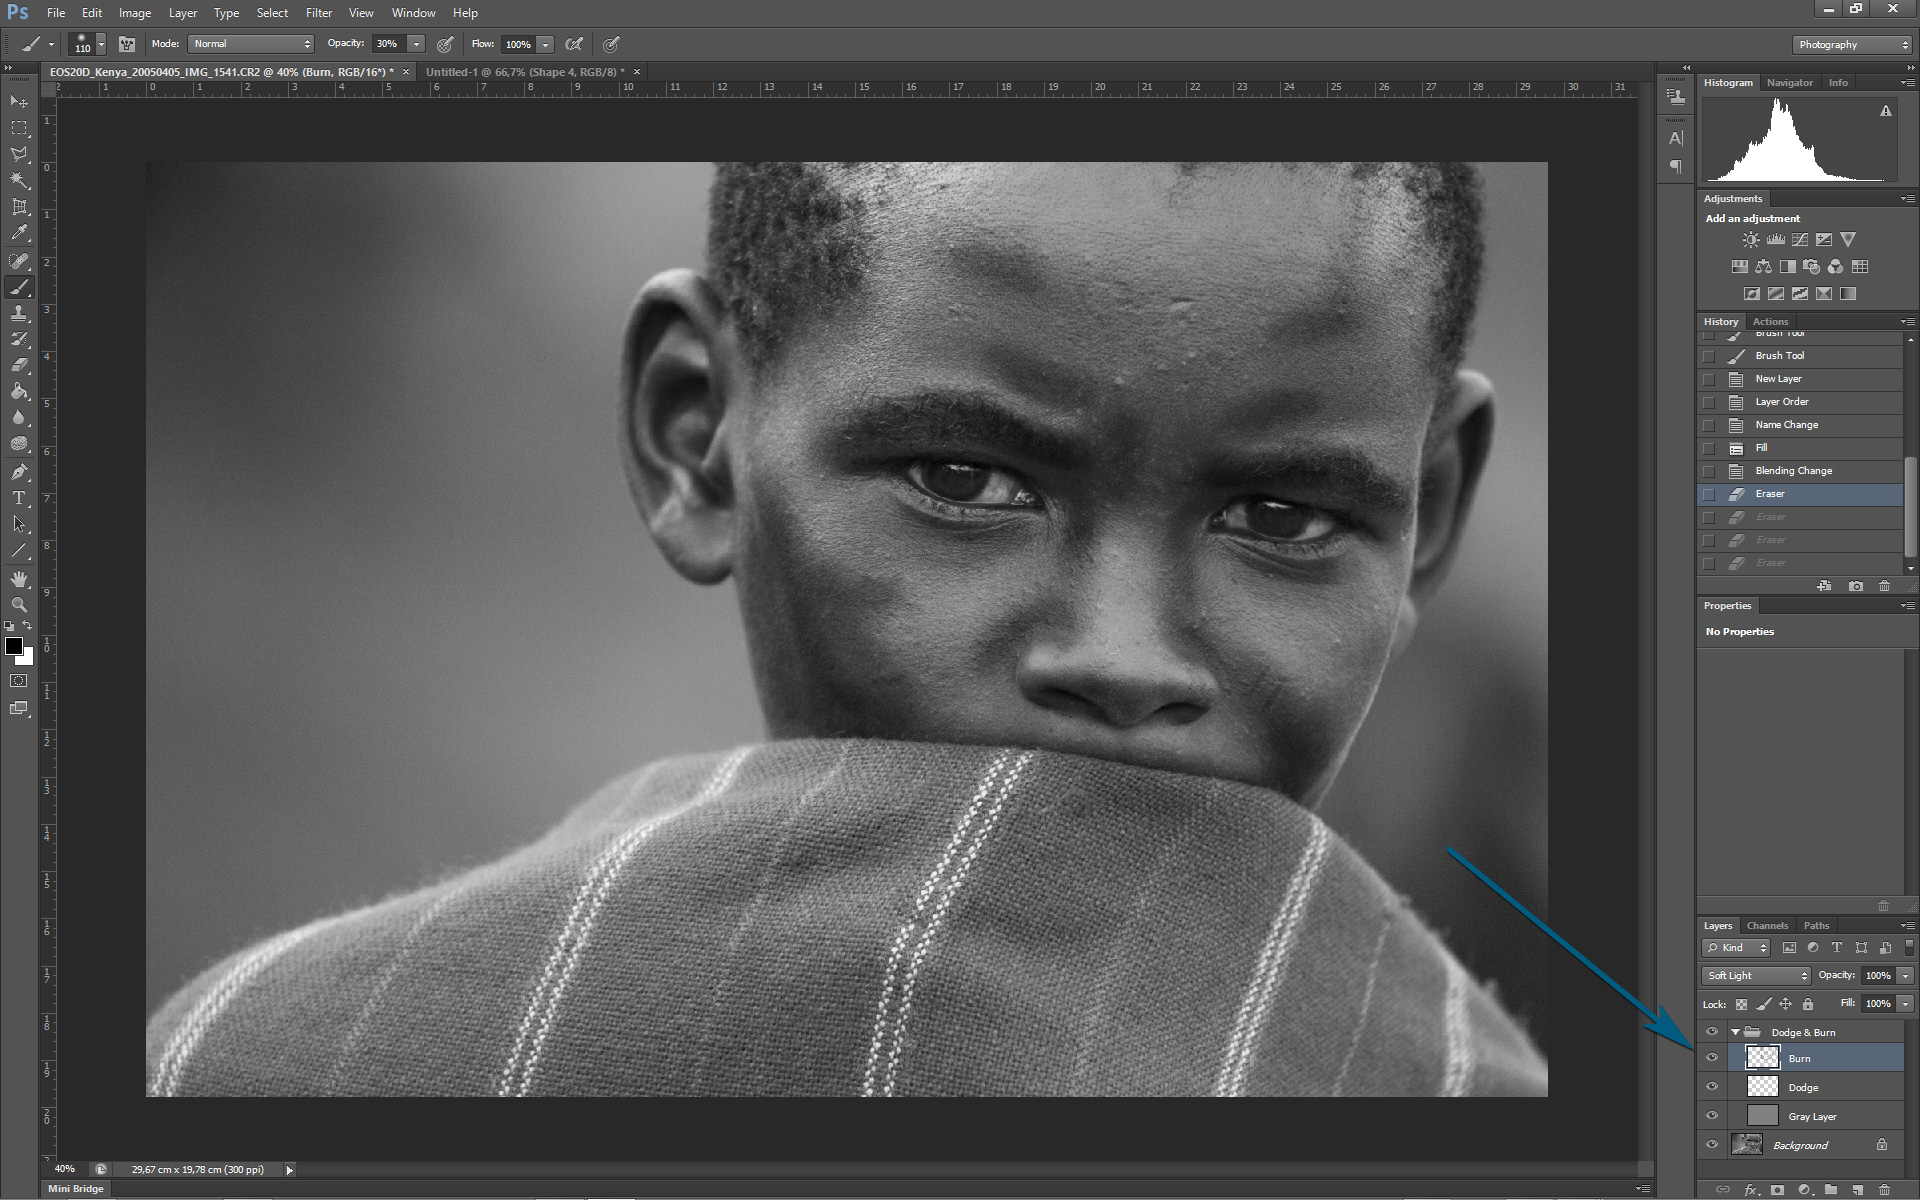
By toggling the background layer’s visibility, you can check the areas you have burned.
As you can see, different brush sizes were used (notice around the eyes). Feel free to vary the brush size/opacity according to your needs.
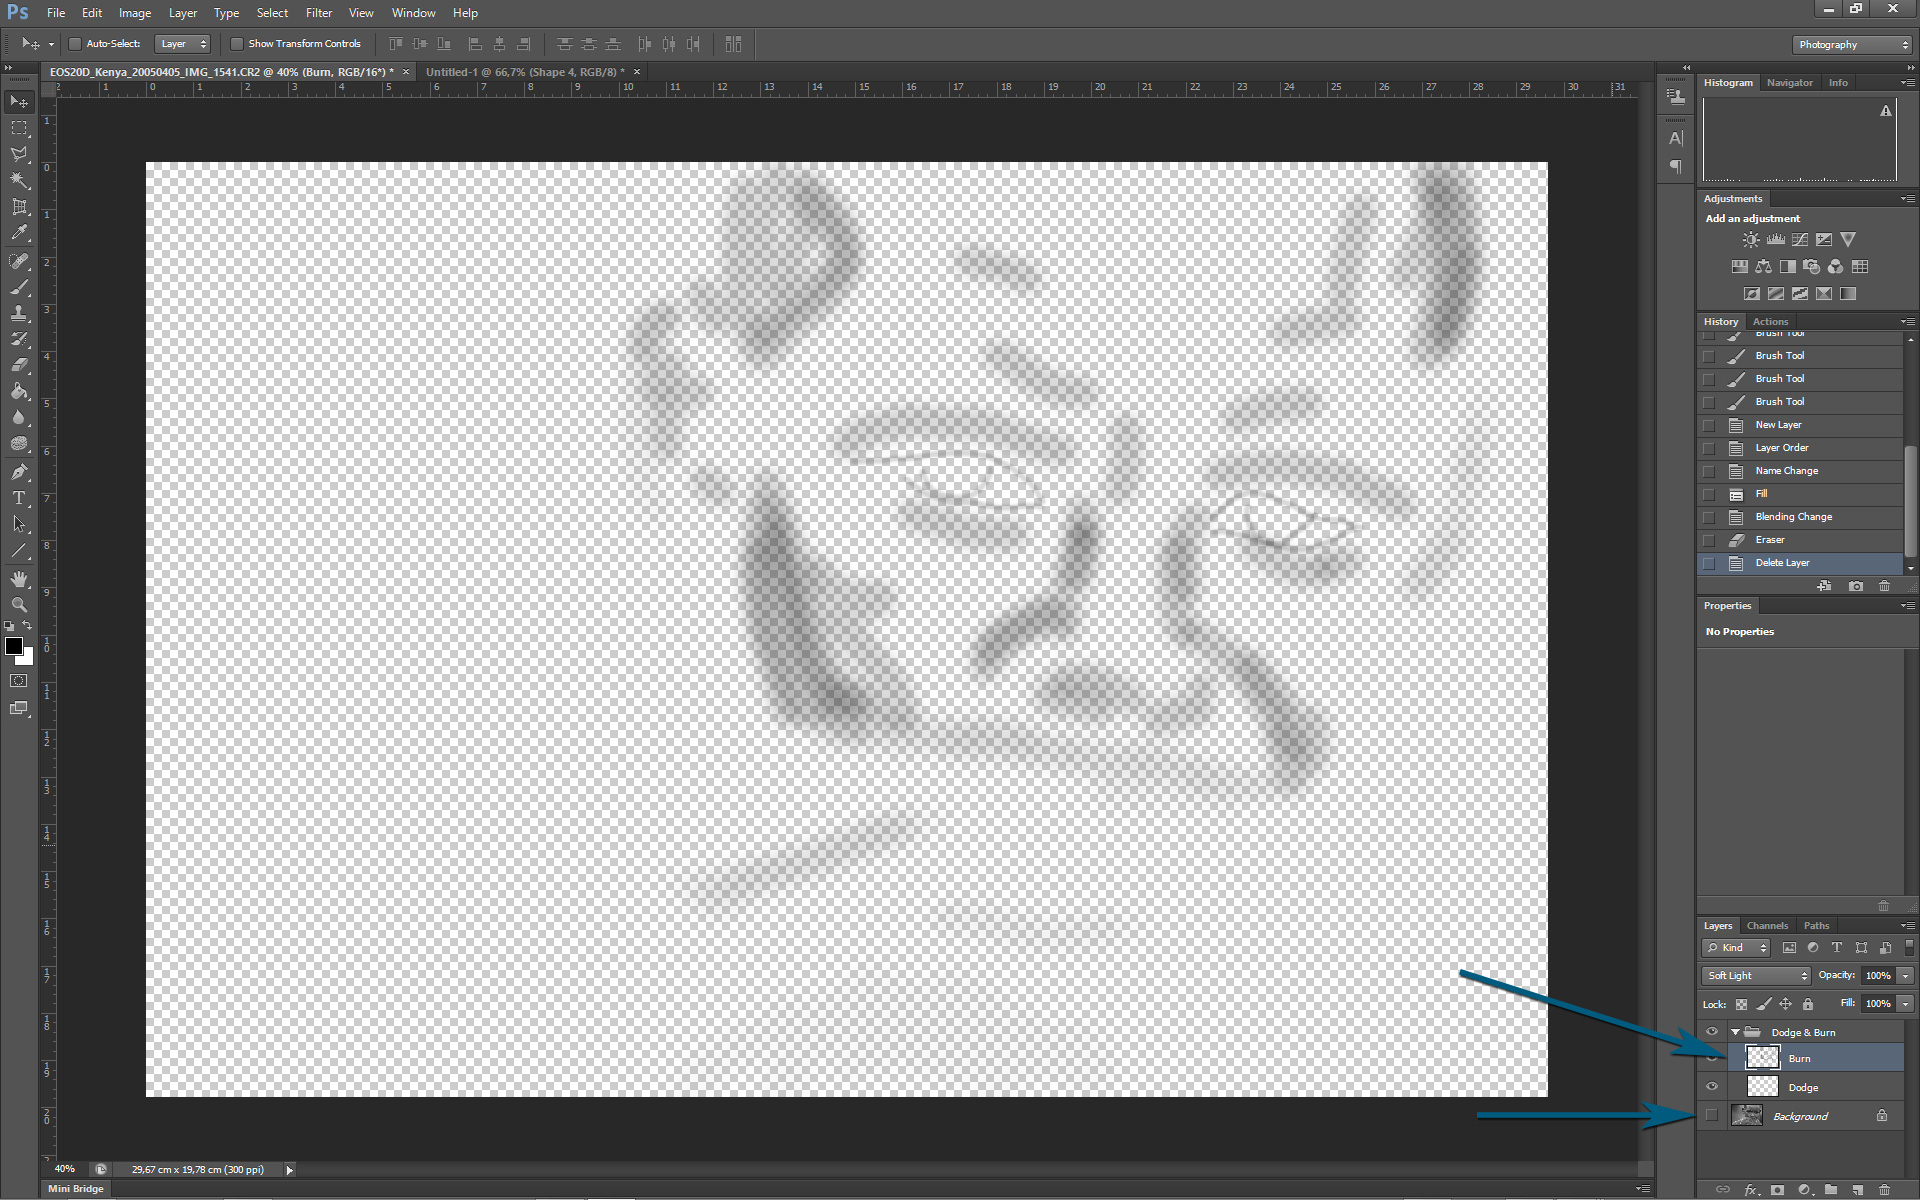
11. Select the Dodge layer. As we want to lighten (dodge), we need to change the brush from black to white. Simply press the X key to invert the foreground and background colors as shown below.
 12. Paint the areas you want to lighten (dodge).
In this example, I dodged the brightest parts of the face.
Now that we have painted over the areas we want to alter, let’s take care of giving it a natural look.
13. With the Dodge layer selected, select Filter > Blur > Gaussian Blur.
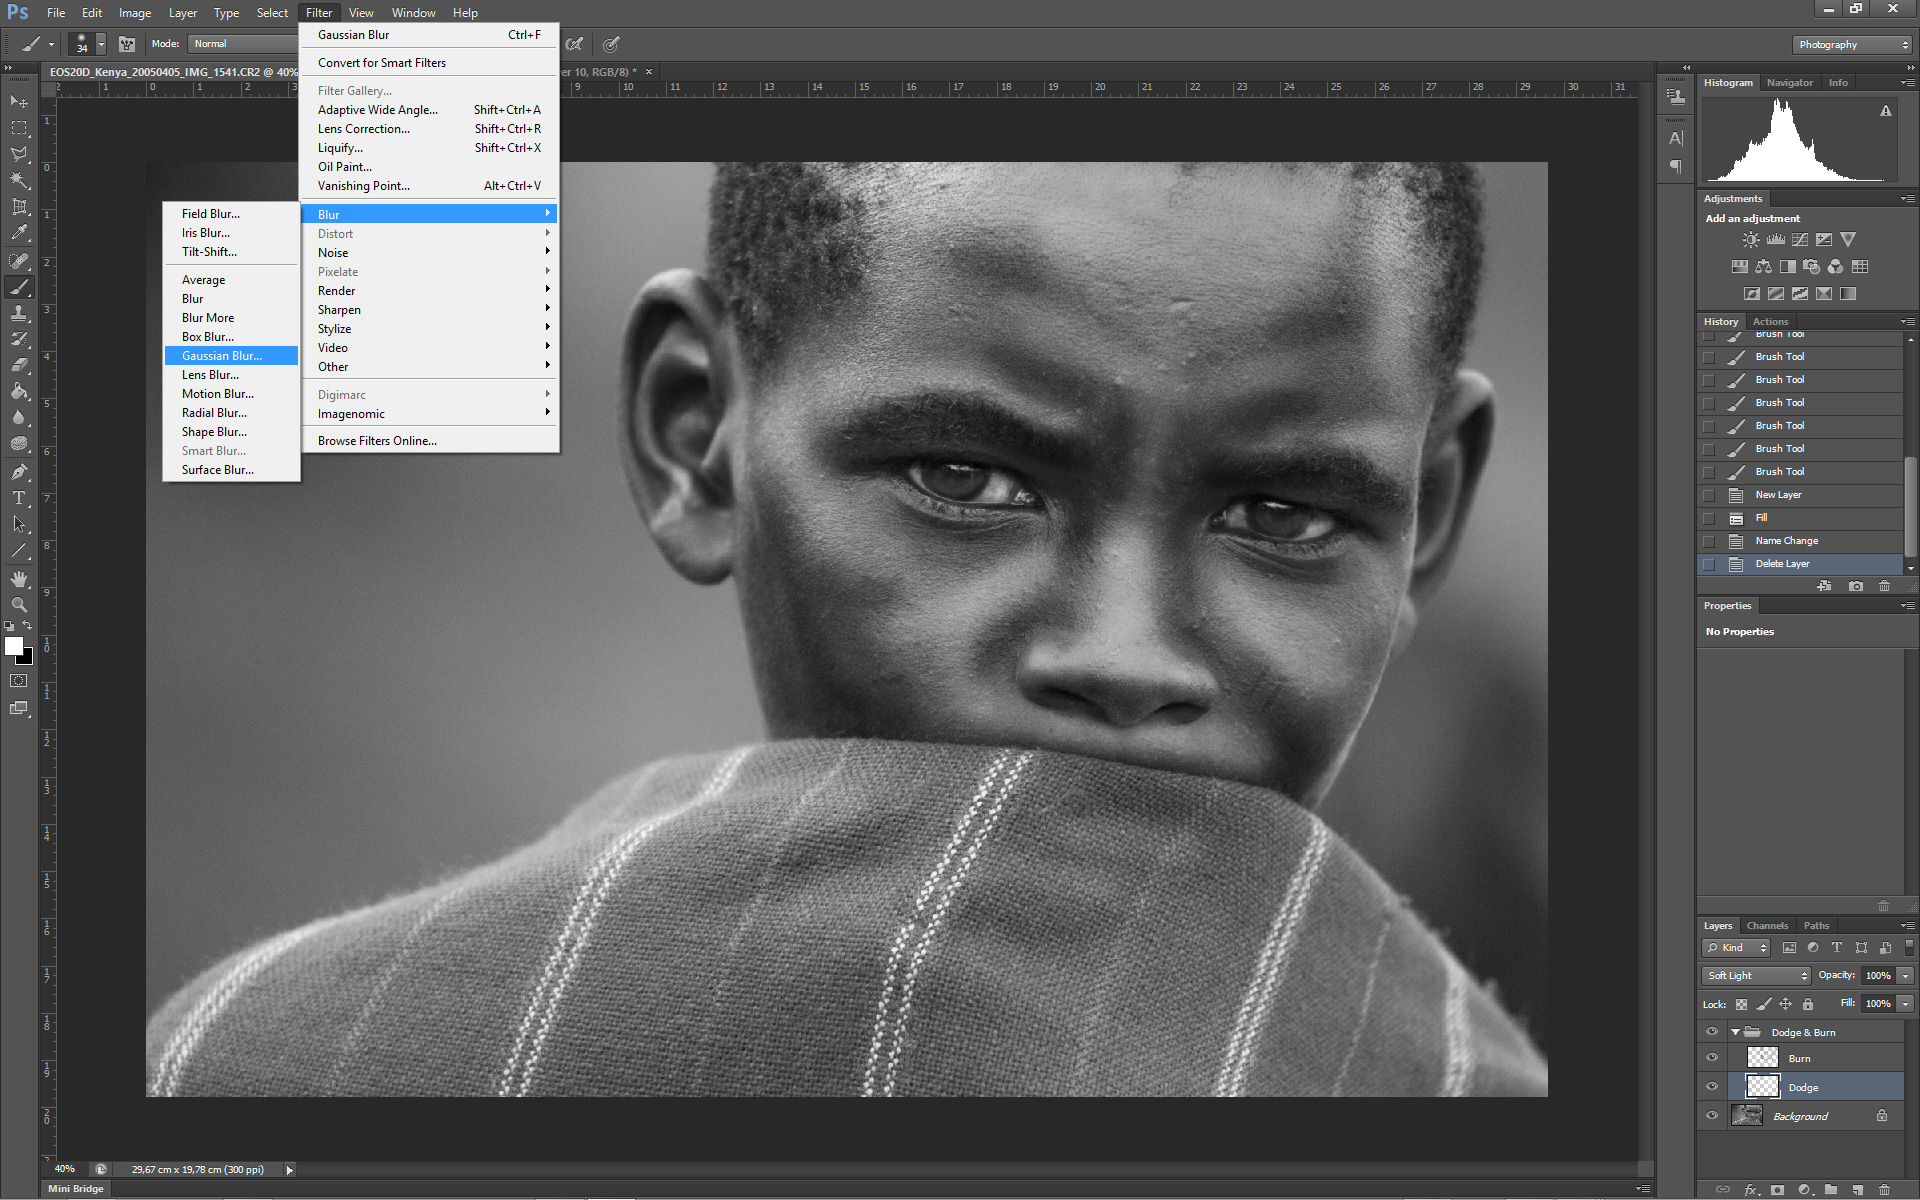
This filter will blur the brush strokes for a softer, more gradual transition.
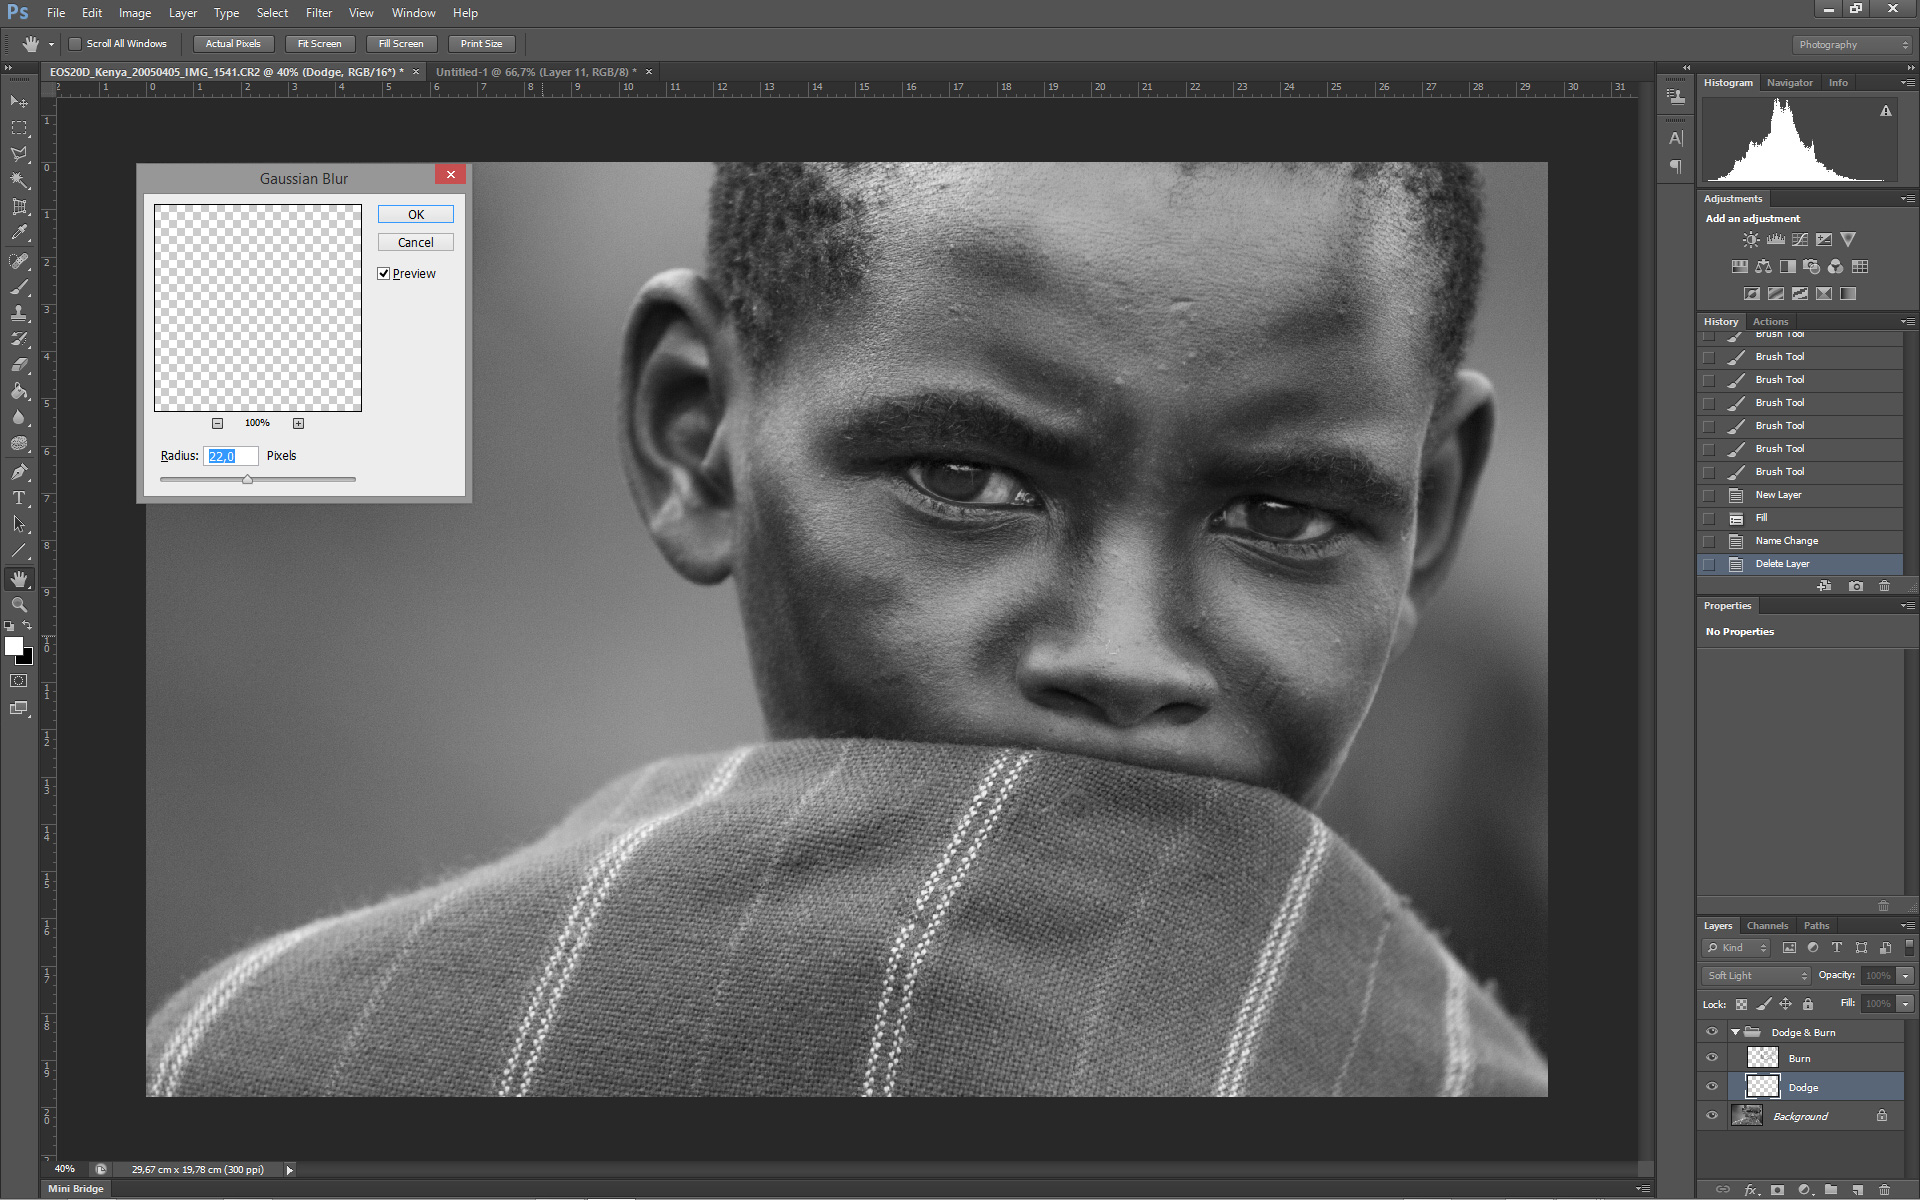
In the Gaussian Blur filter options, select a radius that will soften the edges of the brush strokes until they’re not noticeable.
In this image, for the Dodge layer, I set the radius to 22 pixels. What you set the radius to will, of course, depend on the image. The larger the radius, the softer the edges of the brush strokes will appear.
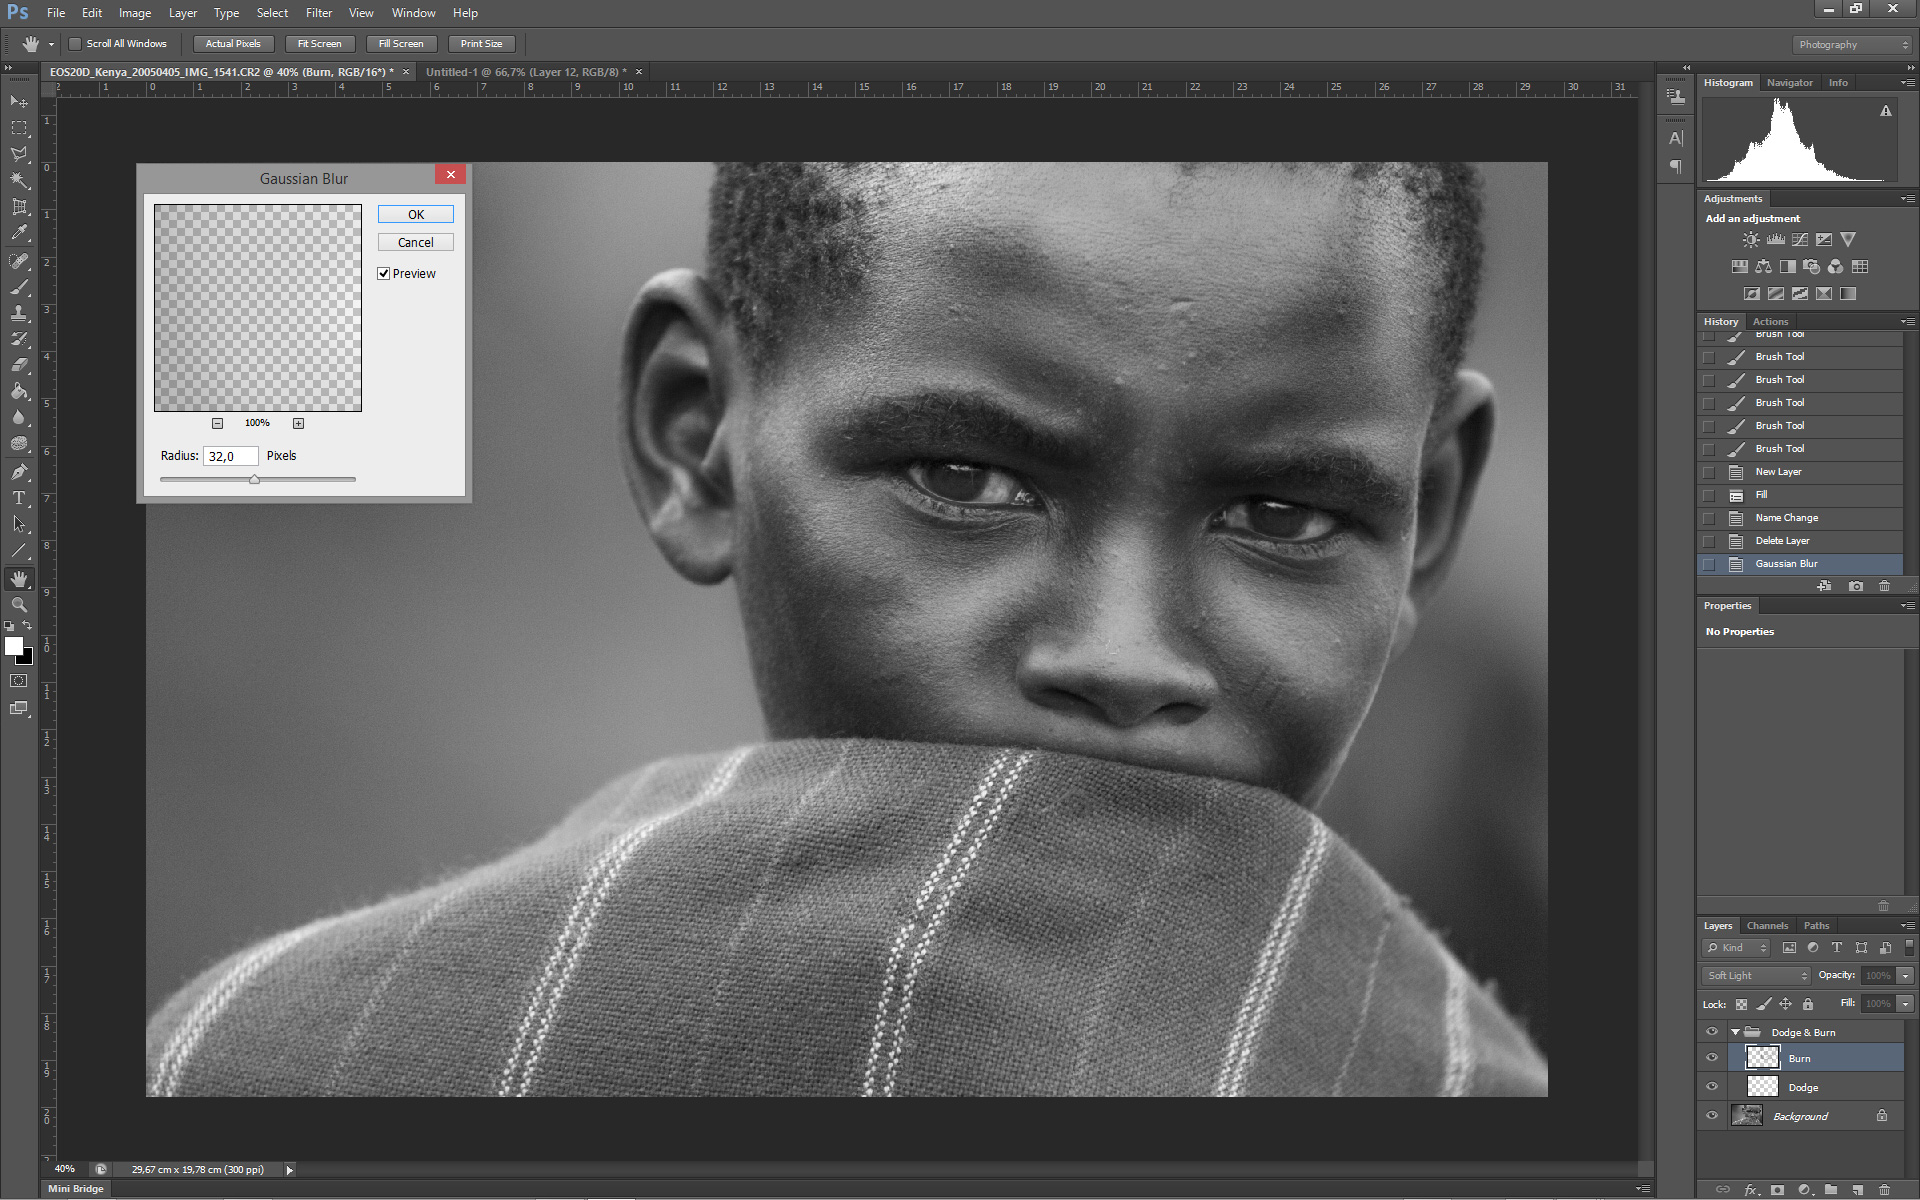
14. Now let’s do the same for the Burn layer. Select the Burn layer and, again, go to Filter -> Blur -> Gaussian Blur.
In this image, I set the radius to 32 pixels since the burning was more obvious.
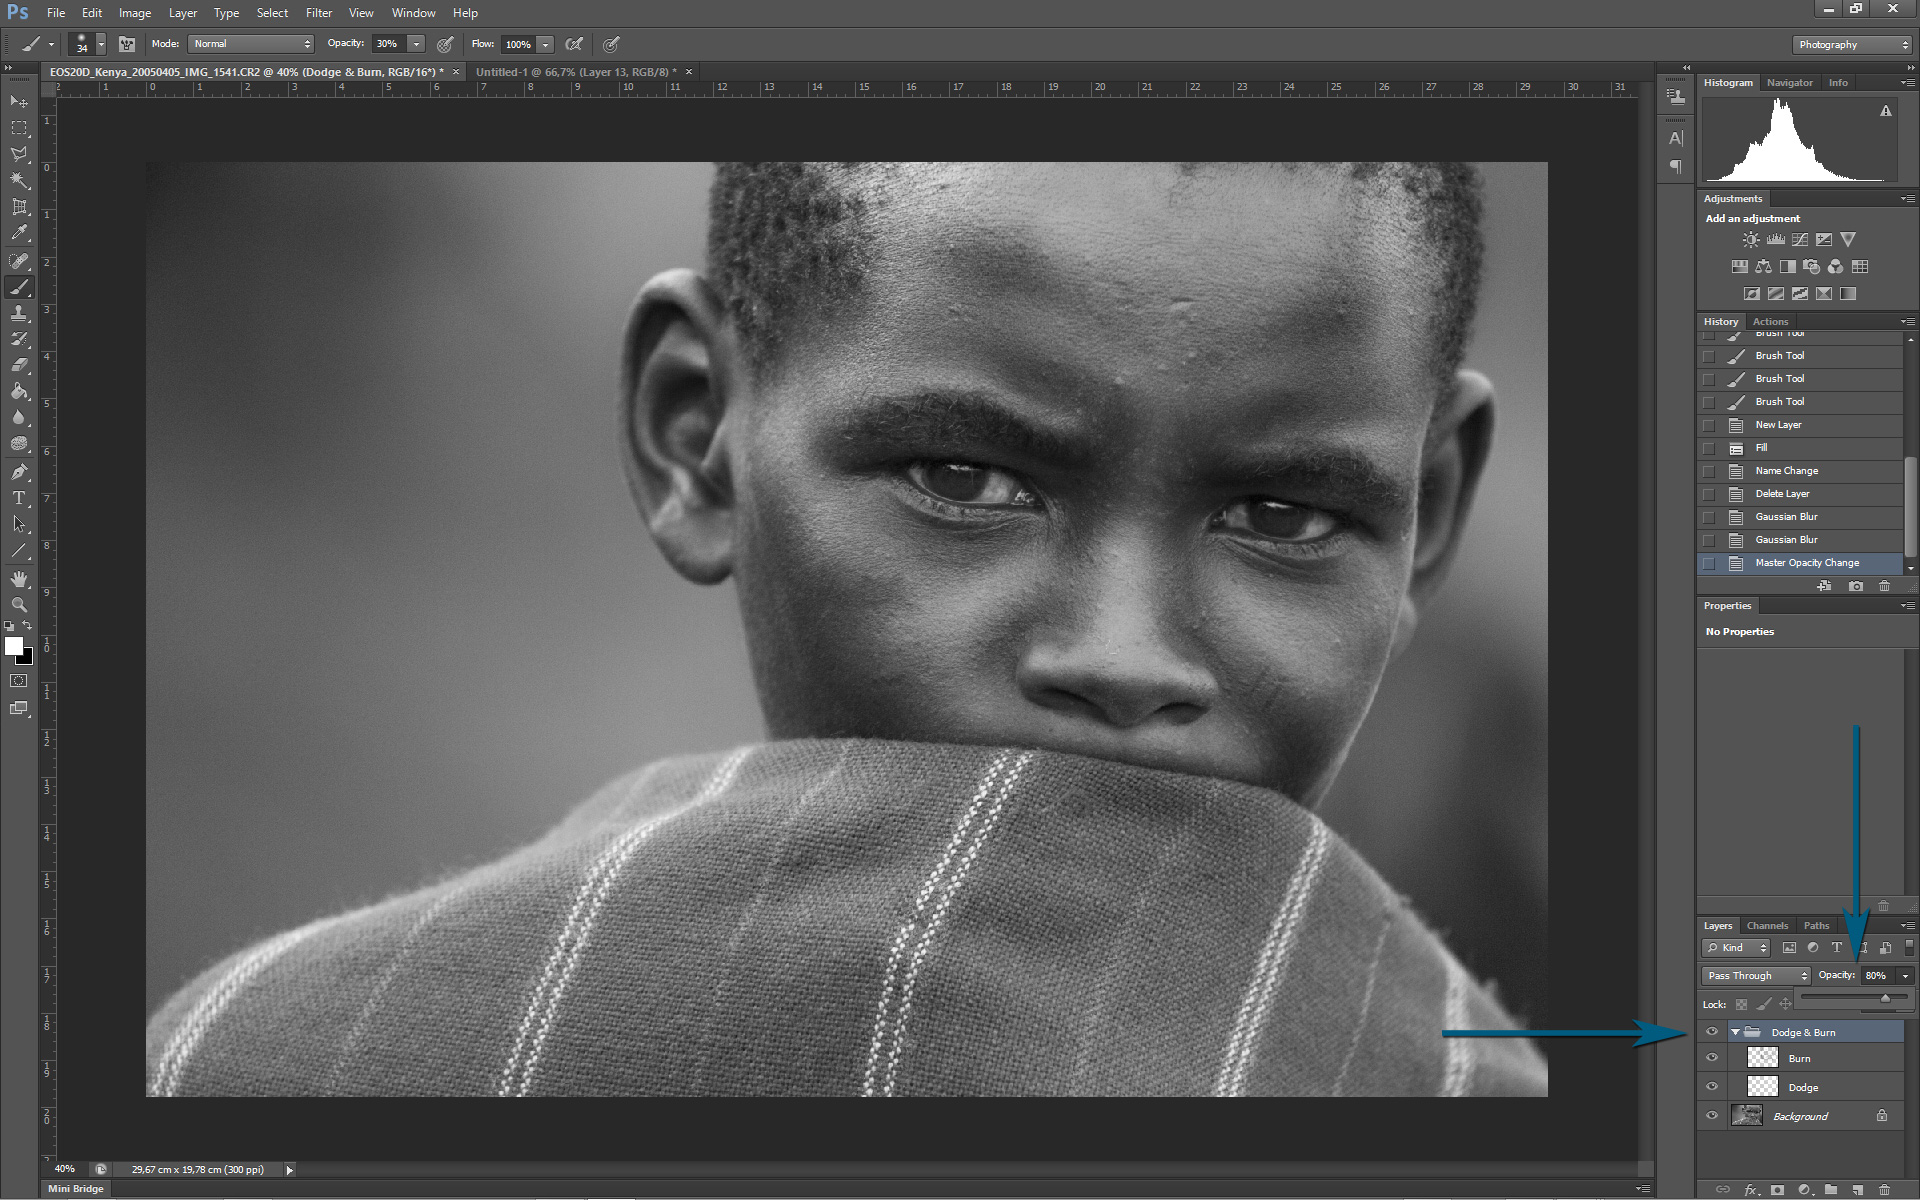
Now that our brush strokes are smooth, let’s reduce the effect so it looks more natural. You can do this independently on each layer, or by simply selecting the group name and changing the opacity for both layers at the same time.
15. To change the opacity of a single layer, select a layer and change the opacity by dragging the Opacity slider in the Layers panel to the left. To change the opacity for both layers at the same time, select the group’s name (Dodge & Burn) and drag the Opacity slider to the left.
16. If you’re not happy with the dodging or burning in some area of the image, select the Eraser Tool from the Tools Panel (or press the E key). With the Eraser Tool’s opacity set to 10%, remove some of the brush strokes you did previously.

Fine Tuning
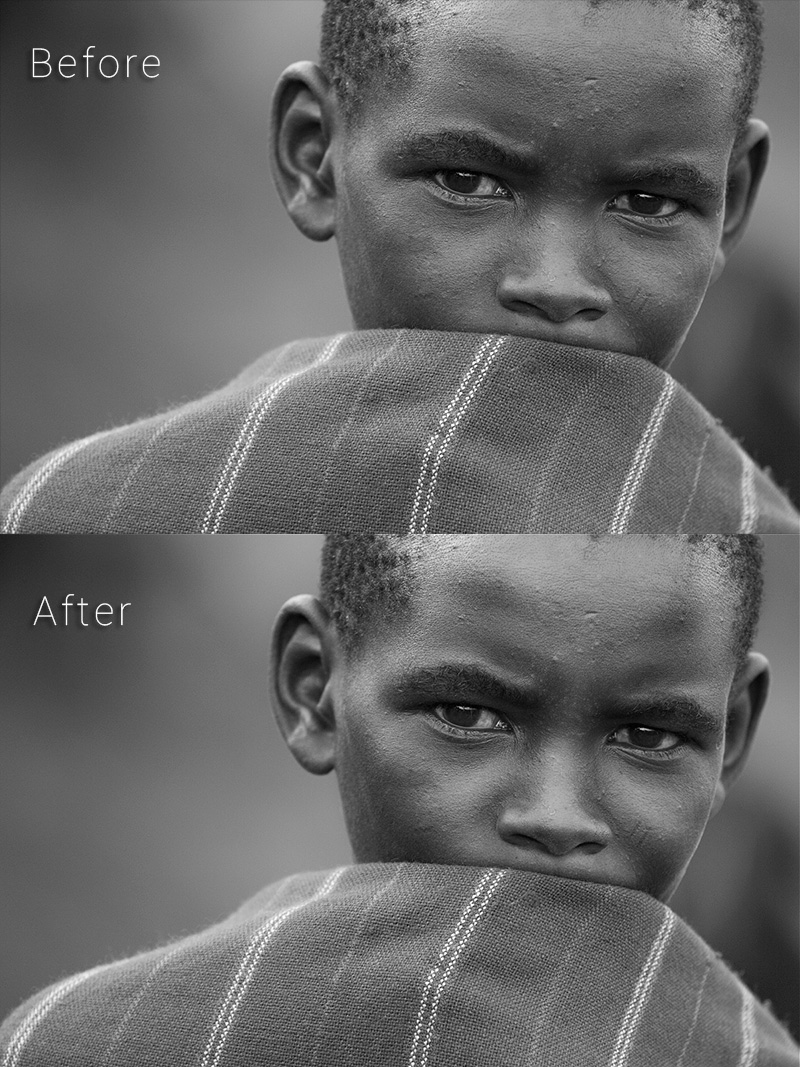
I went back and changed the opacity of the dodge and burn layers independently as described in step 15. Here’s the final result (and also a before and after):

As you can see, the processed image is punchier and has an almost three dimensional feel as the facial features are emphasized.
Final Notes
- You can create as many Dodge and Burn layers/groups as you want to work on different parts of the image independently. For the sake of simplicity, in this tutorial, I only created one group.
- For finer detail dodging and burning, do it in a separate group and use low to no blur effect.
- Dodging and burning is crucial to create the images you envision. This technique (or any other dodging and burning technique you’re comfortable using) can be applied to any type of image, not only portraits.
I hope you enjoyed this tutorial. If you have questions or suggestions, please leave them in the comments section below or email me at info@antonionunes.com.

One thought on “Tutorial: Non-destructive dodge and burn”
Excelente tutorial.
É uma técnica que vou começar a usar em detrimento de outras mais destrutivas ou trabalhosas.
(Estou sempre a aprender; Nunca mais me lembraria daquele toque de “gaussian”)
Muito obrigado.
Zacarias Pereira da Mata